AI photo editor research
14 AI Photo Editor Onboarding Examples
The best AI photo editor onboarding screens explain what goes in, what the model will change, and what a usable result looks like before the first upload.
AI photo editing introduces more uncertainty than a conventional filter. A new user may not know which photo will work, whether the original is preserved, how long generation takes, or how much control remains after the result appears. Onboarding should reduce those questions in the order they become relevant, not front-load a tour of every model and effect.
This review uses fourteen recorded in-app screens from Menace, GoPhoto, Modyfy, Precious, Refina, VSCO, Lynsify, and PhotoDirector. Every example comes from an AI photo product or an editor with a visible AI workflow. The examples are interface evidence, not proof that a pattern improves activation or revenue. Each image opens its exact ScreensDesign replay moment so a designer can inspect the surrounding sequence before borrowing an idea.
For the broader principles behind hierarchy and first-use flow, read the mobile app design guide. Compare this category with the AI app onboarding examples when the product also uses chat, generation credits, or model selection.
01. Product promise
Show one believable transformation, not a wall of features.
A concrete before-and-after model gives the first upload a reason.
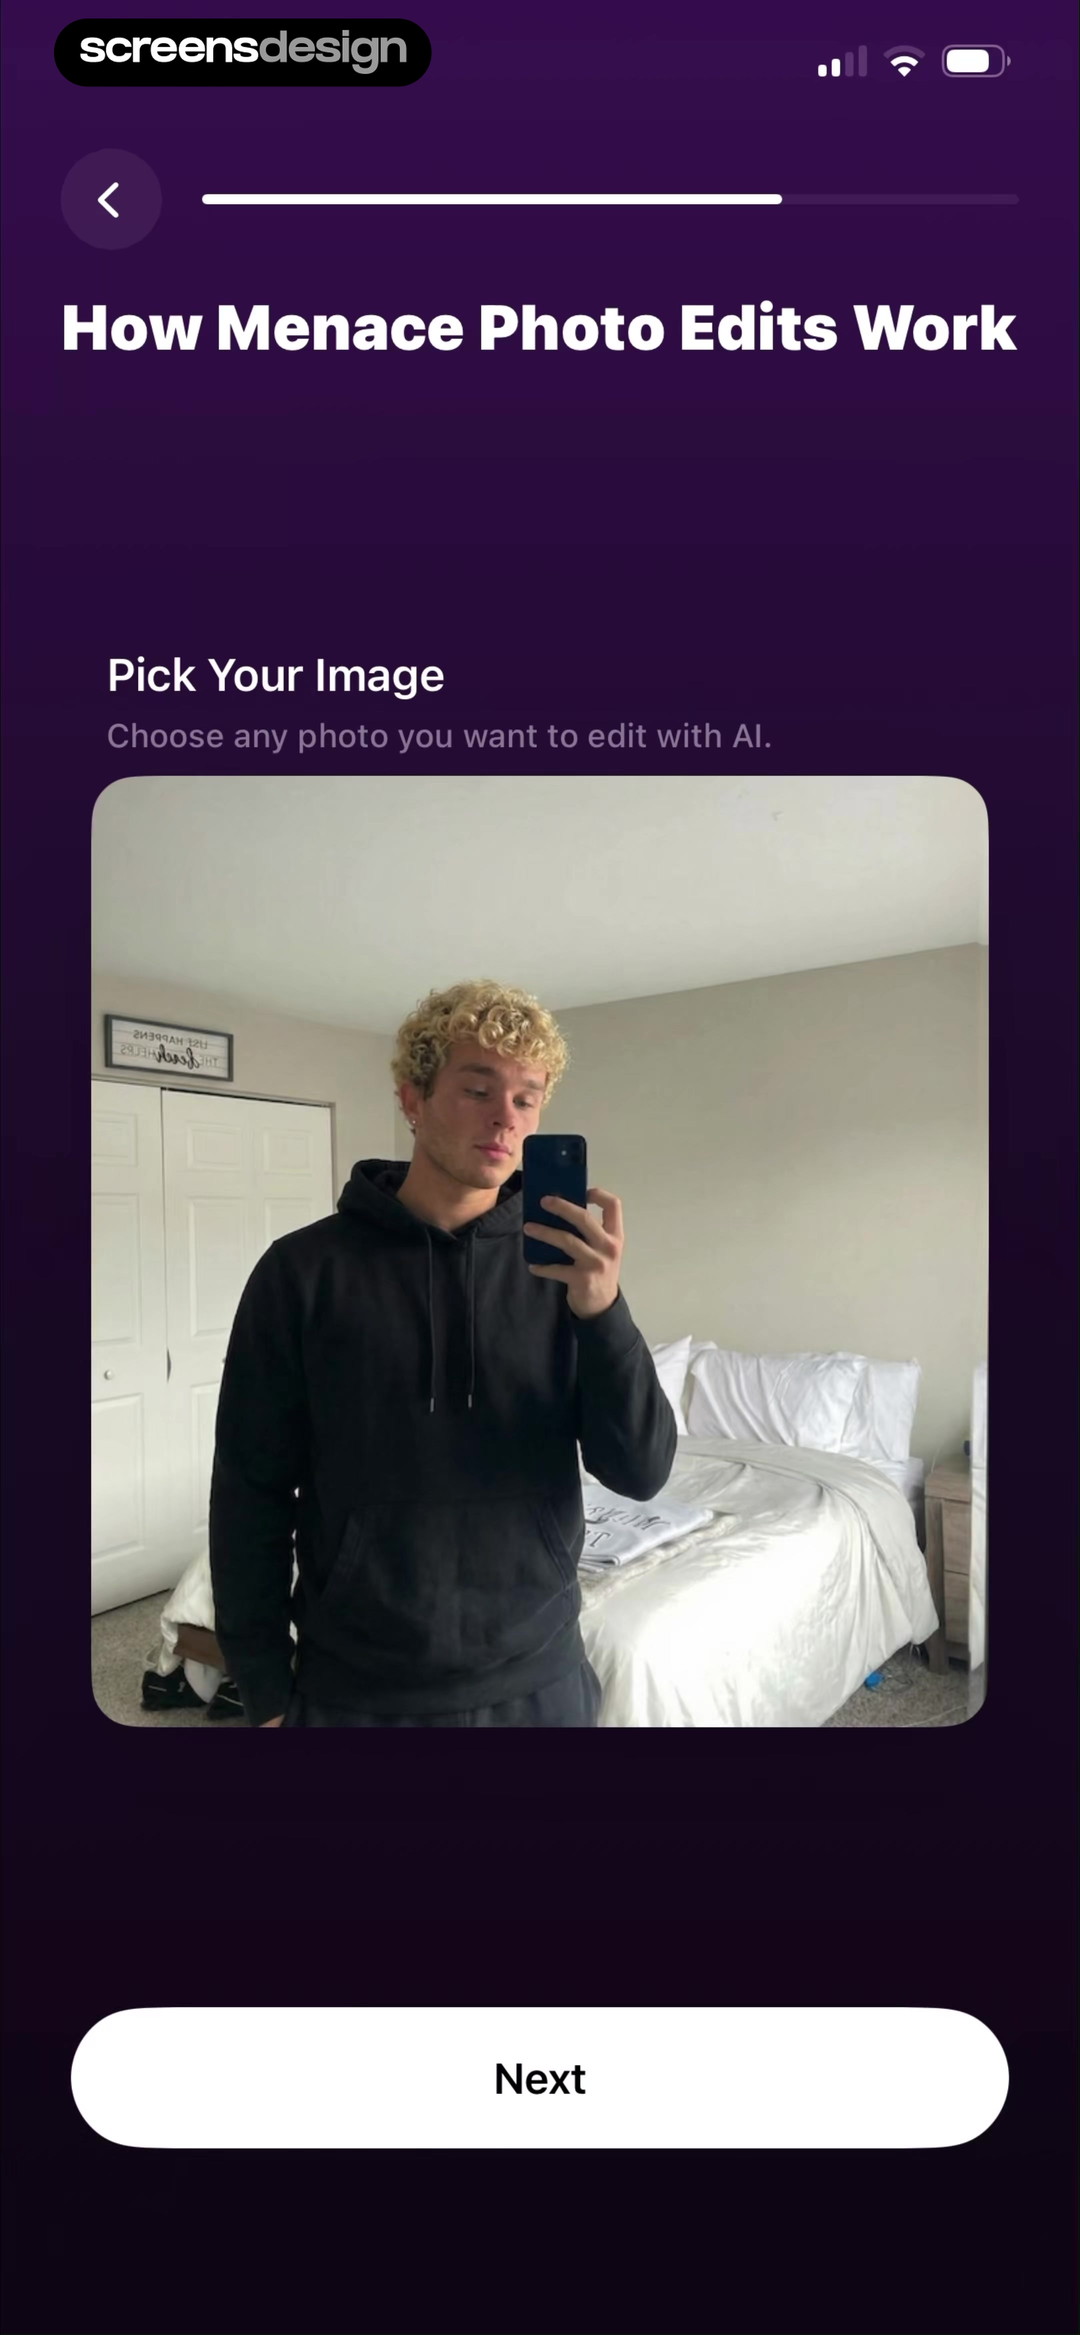
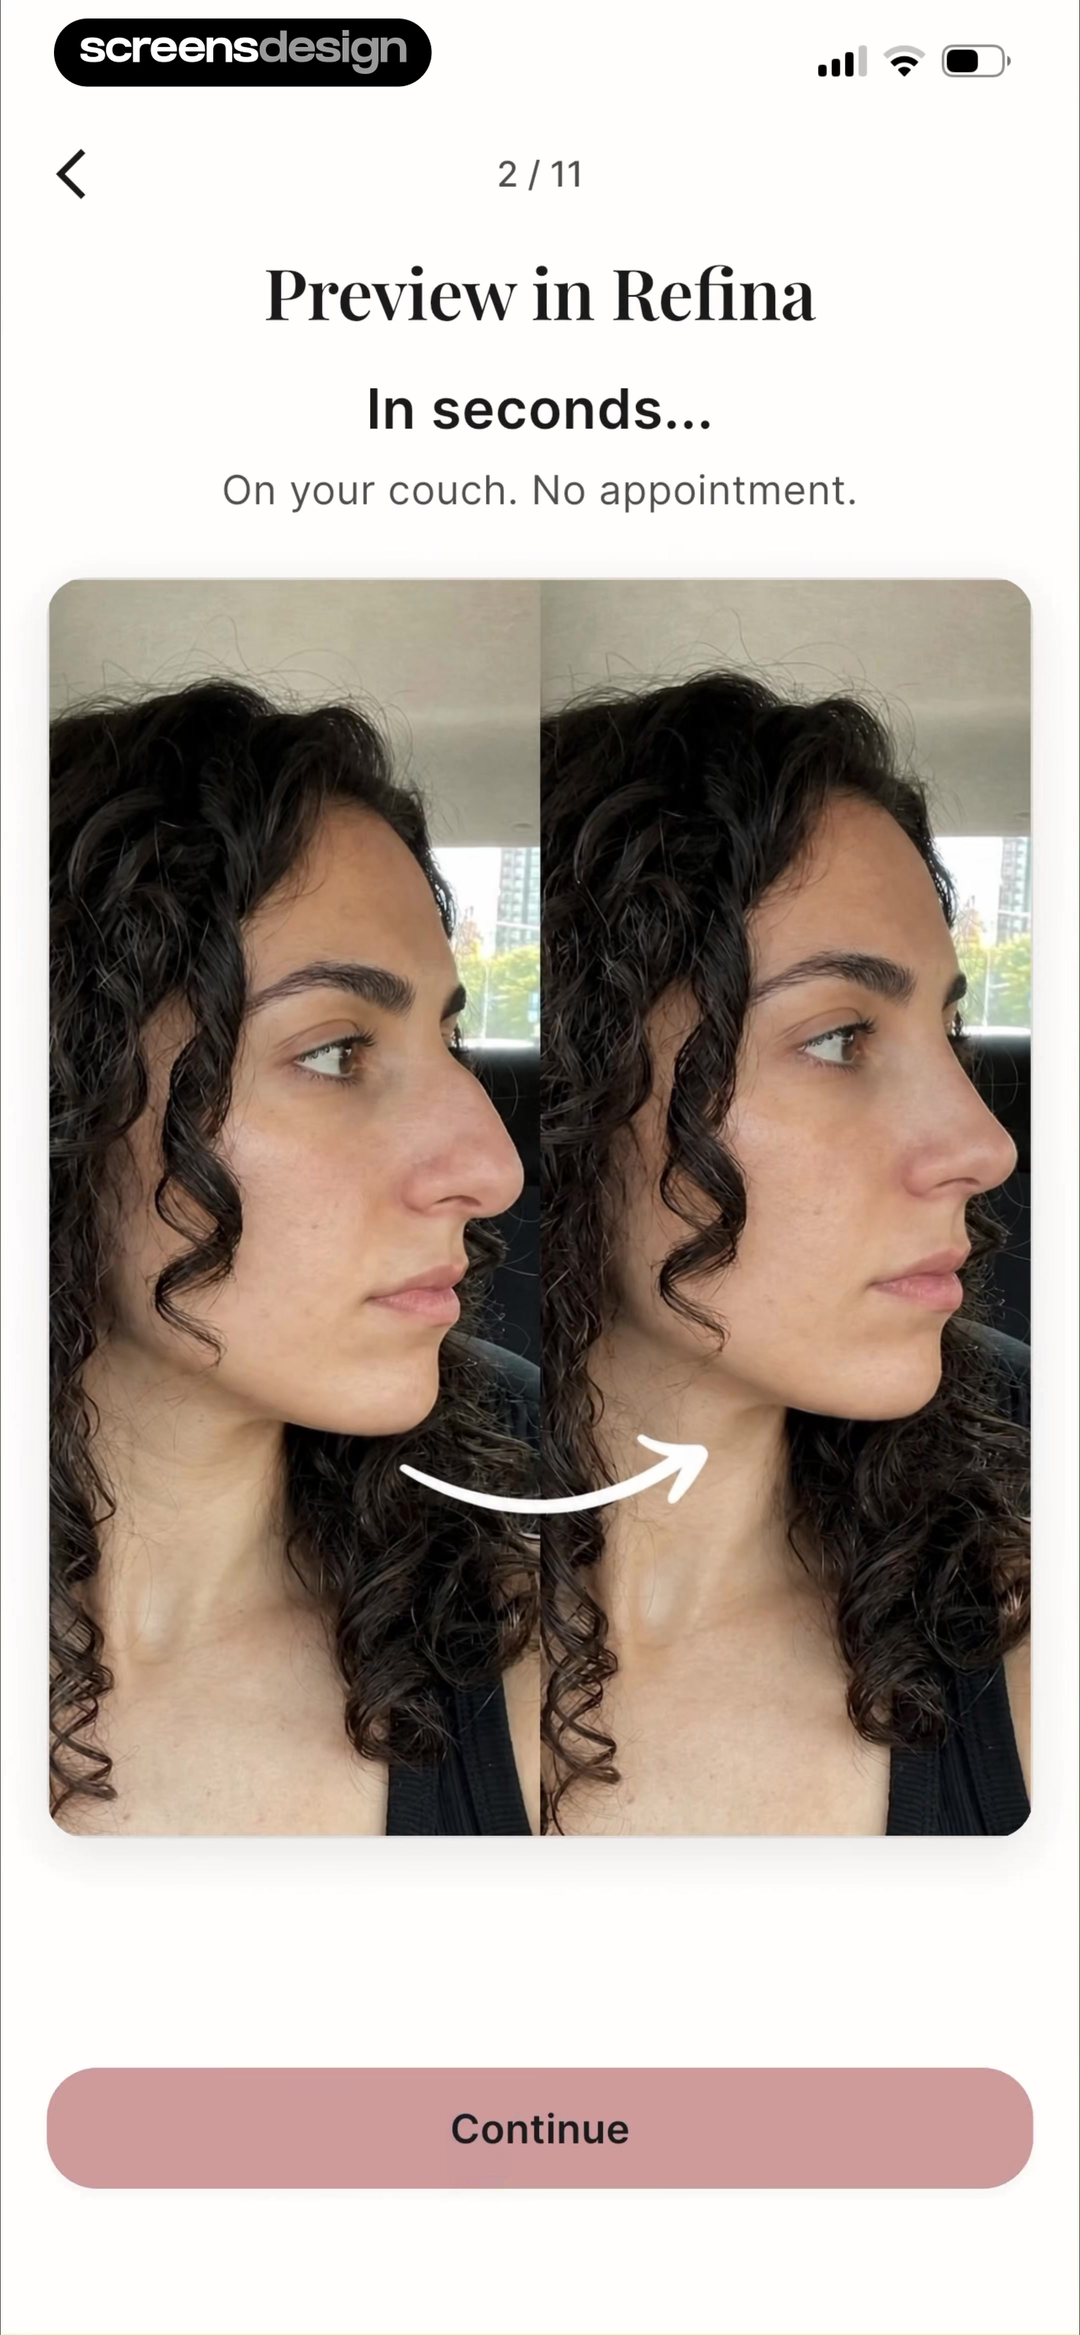
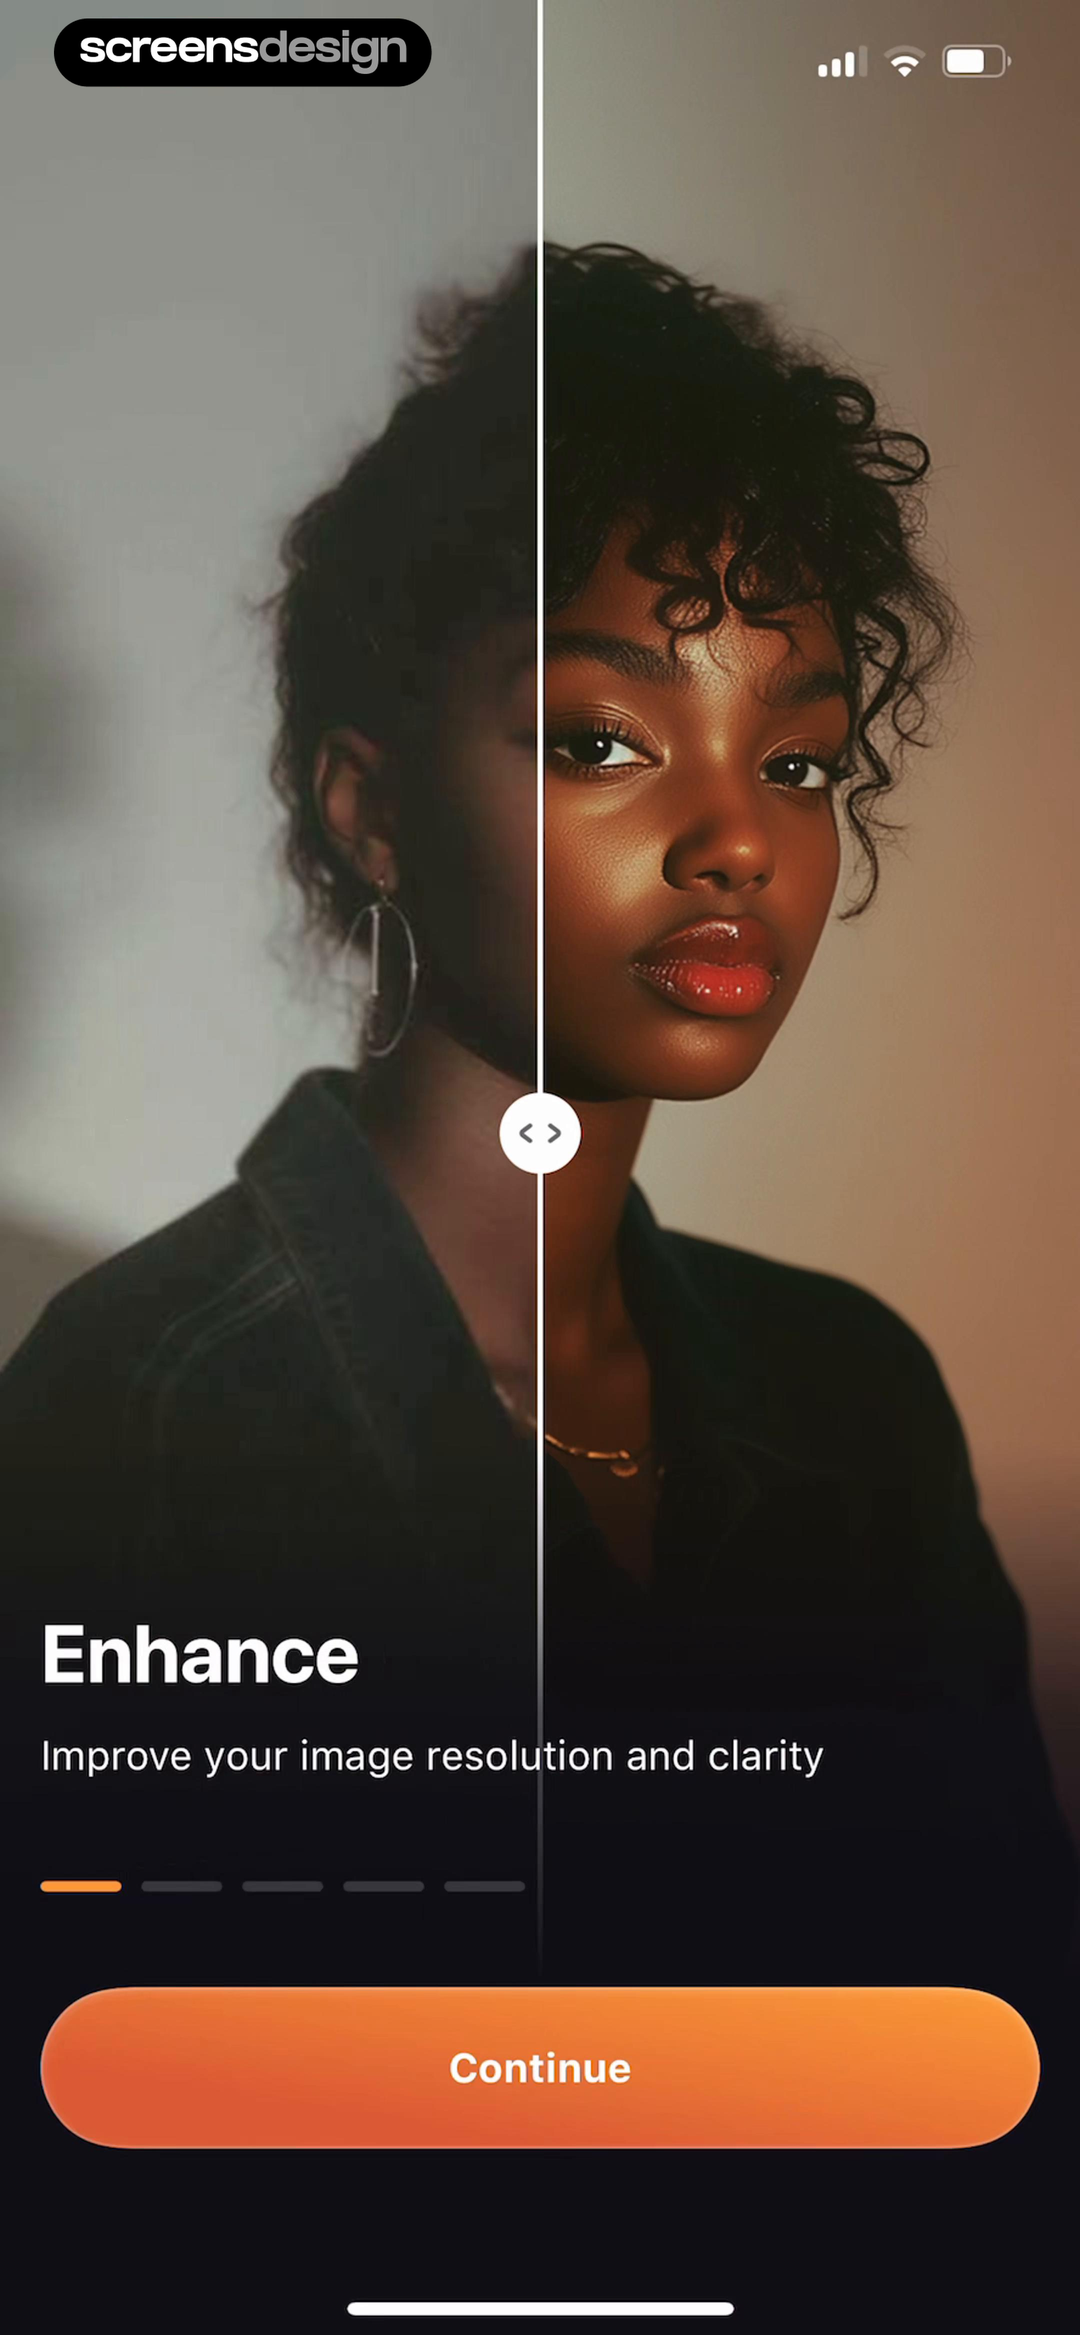
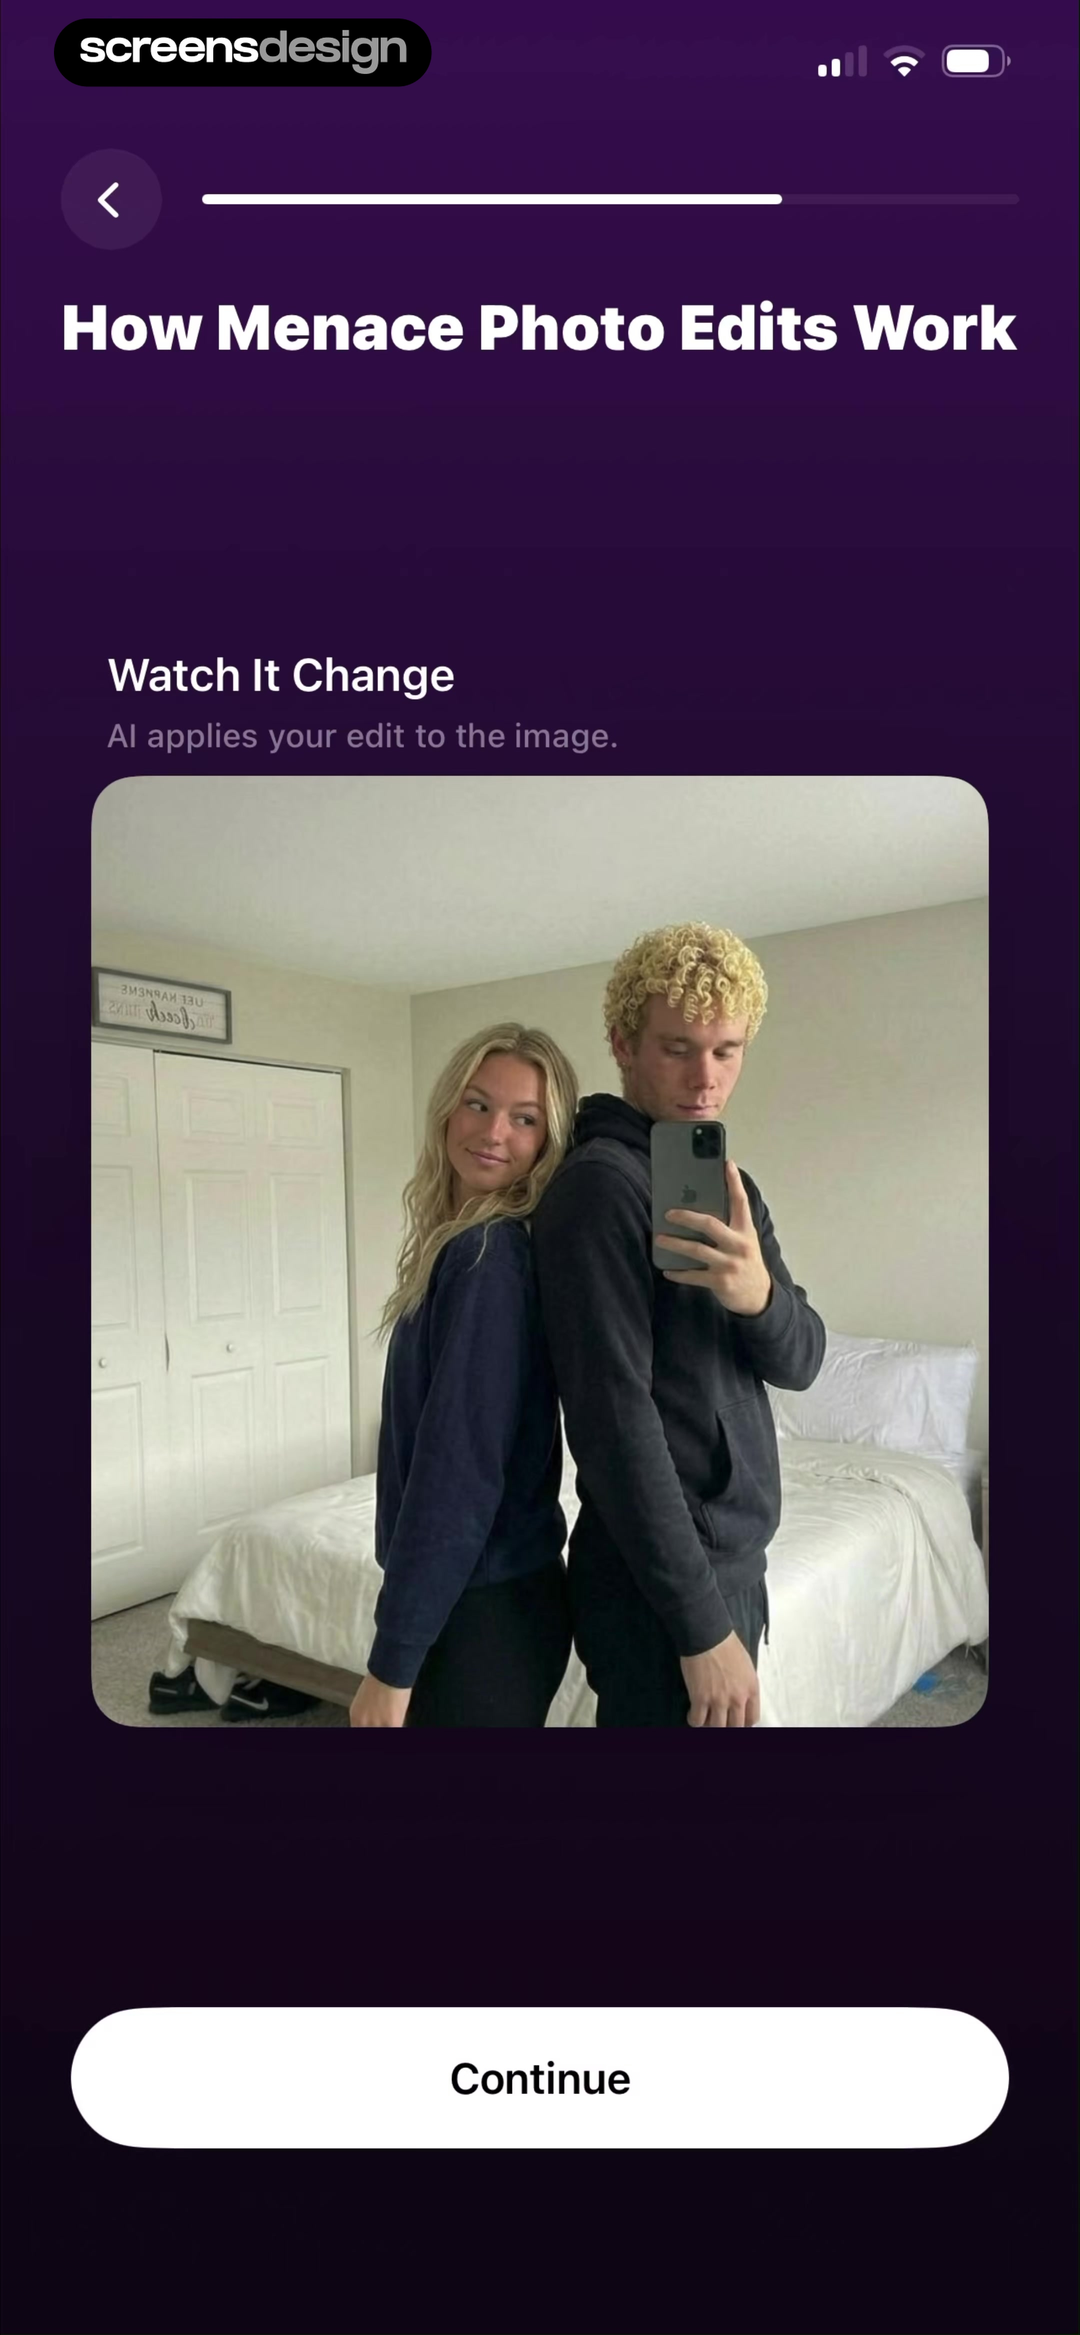
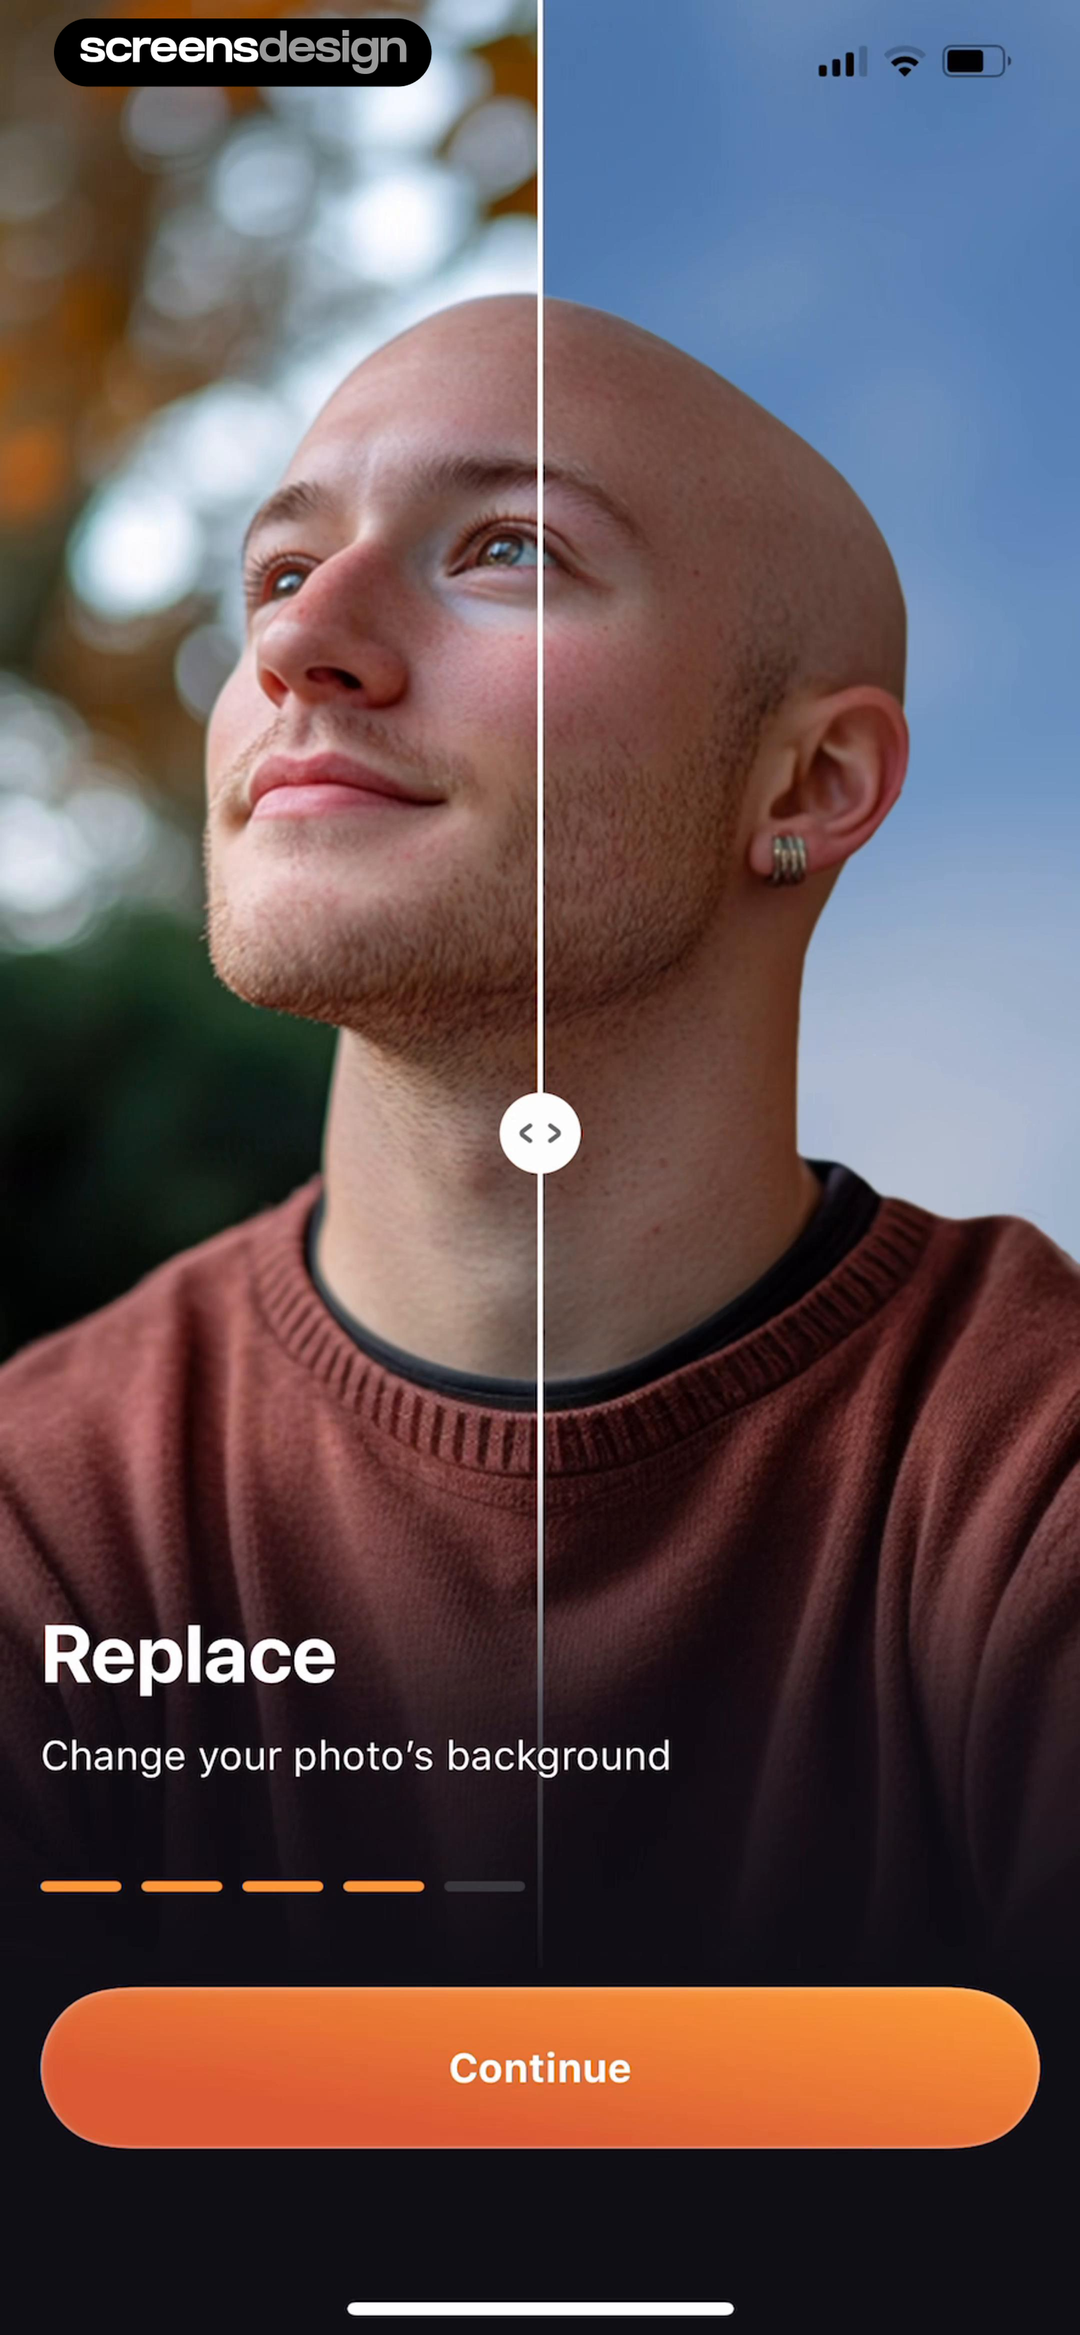
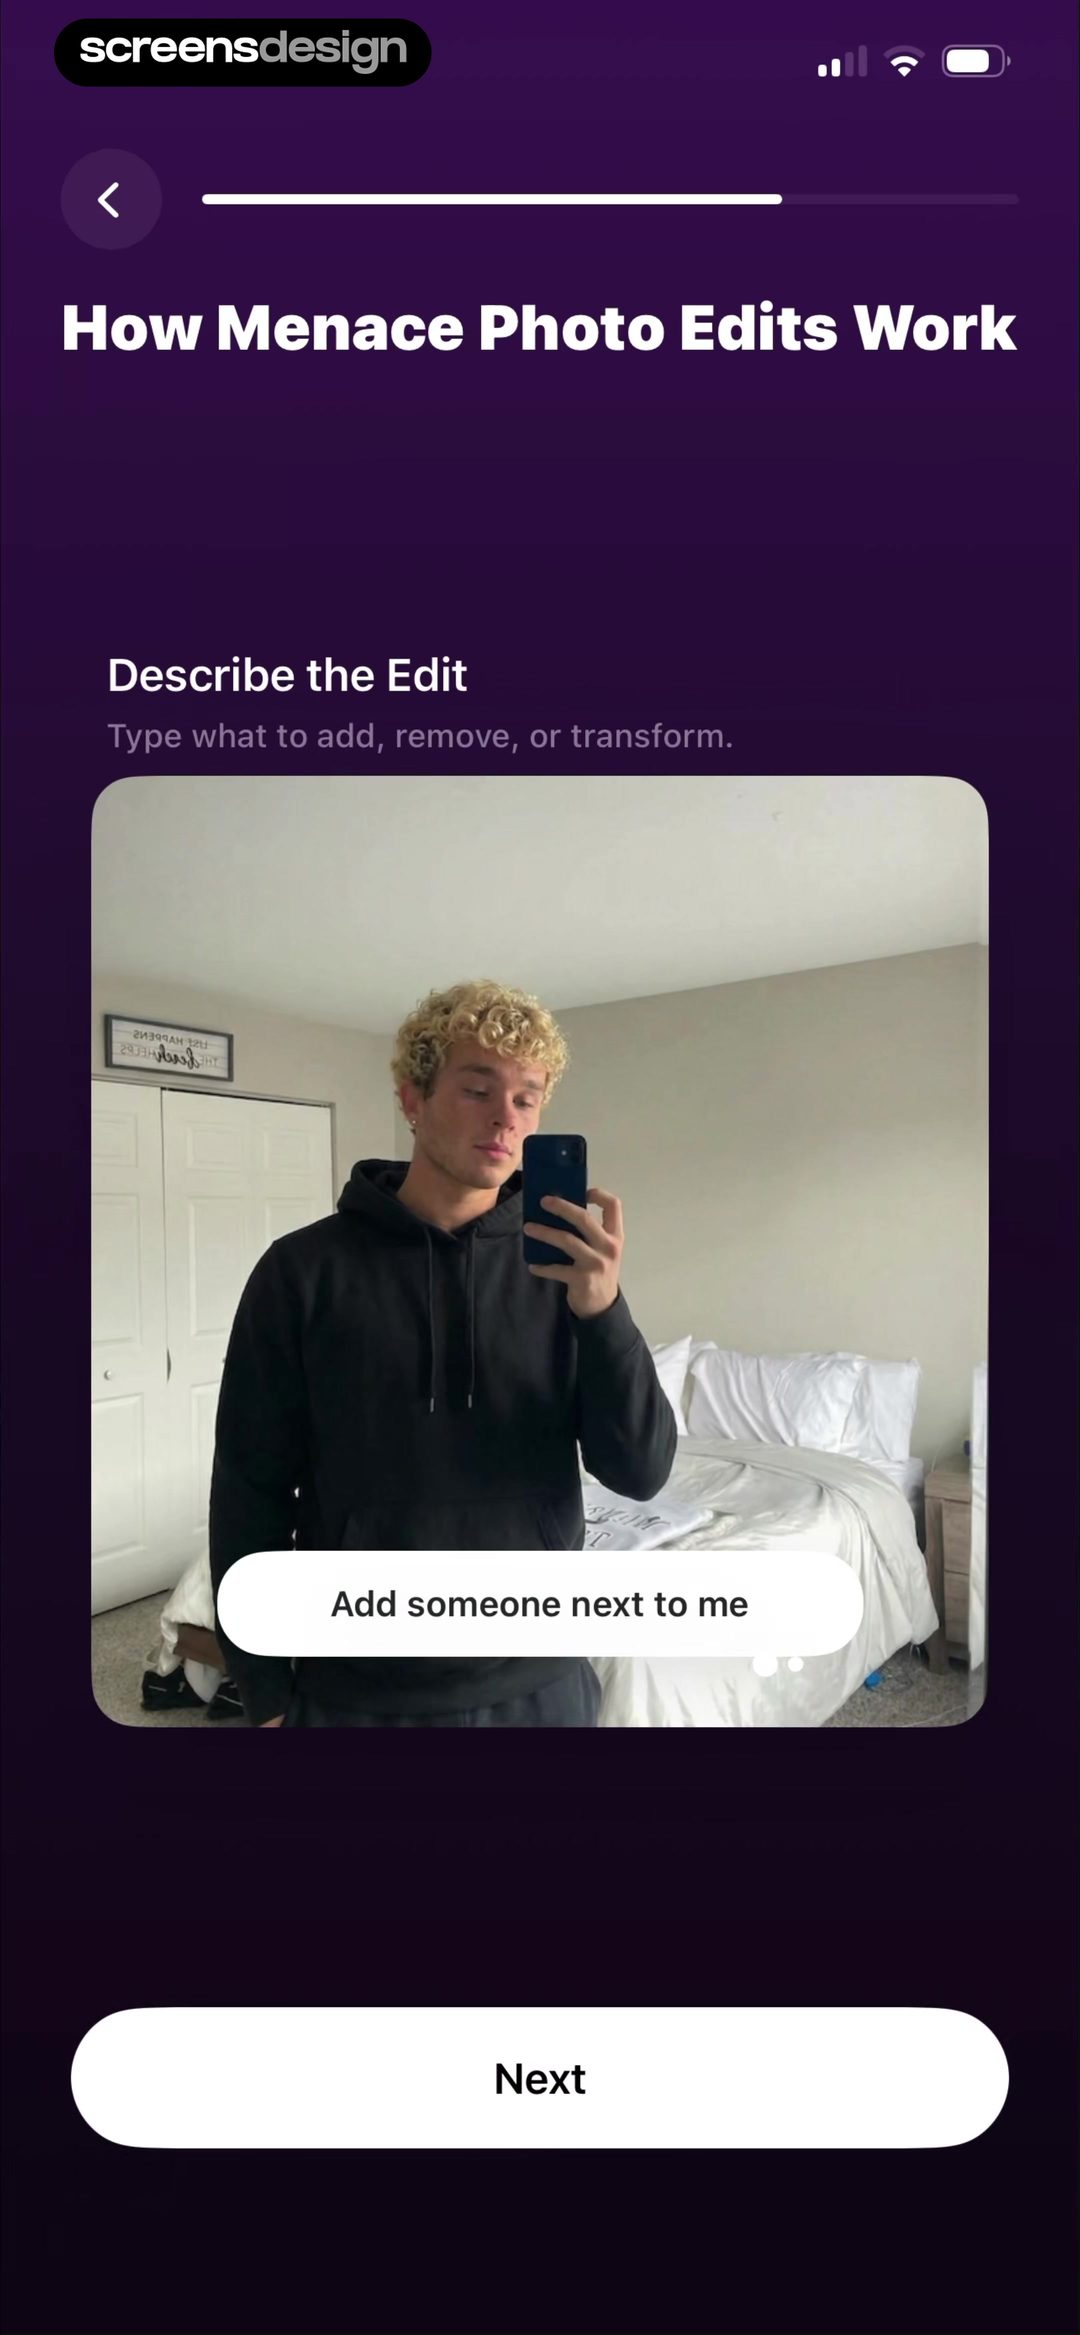
Menace breaks its explanation into a source step and a change step: pick an image, then watch AI apply the edit. Refina leads with an outcome preview and a specific context. Lynsify names one concrete transformation, image enhancement, and explains the expected improvement before Continue. These are three different levels of commitment, but each gives the next action meaning.
Avoid a carousel where every page introduces another capability with no visible relationship to the first task. If the core loop is source, instruction, generation, refinement, show that loop. If the app is an editor with AI added to an established studio, place the new capability inside the existing workspace instead of presenting it as a separate universe.
Write the promise so it survives contact with an imperfect result. Words such as preview, explore, try, or generate set a more honest expectation than language that guarantees professional output. The onboarding should also leave room for the user to understand when a result is synthetic, when a source image is analyzed, and what will happen to uploaded media.
02. Photo intake
Ask for the minimum source the model actually needs.
Every additional photo, angle, or permission should have a visible reason.
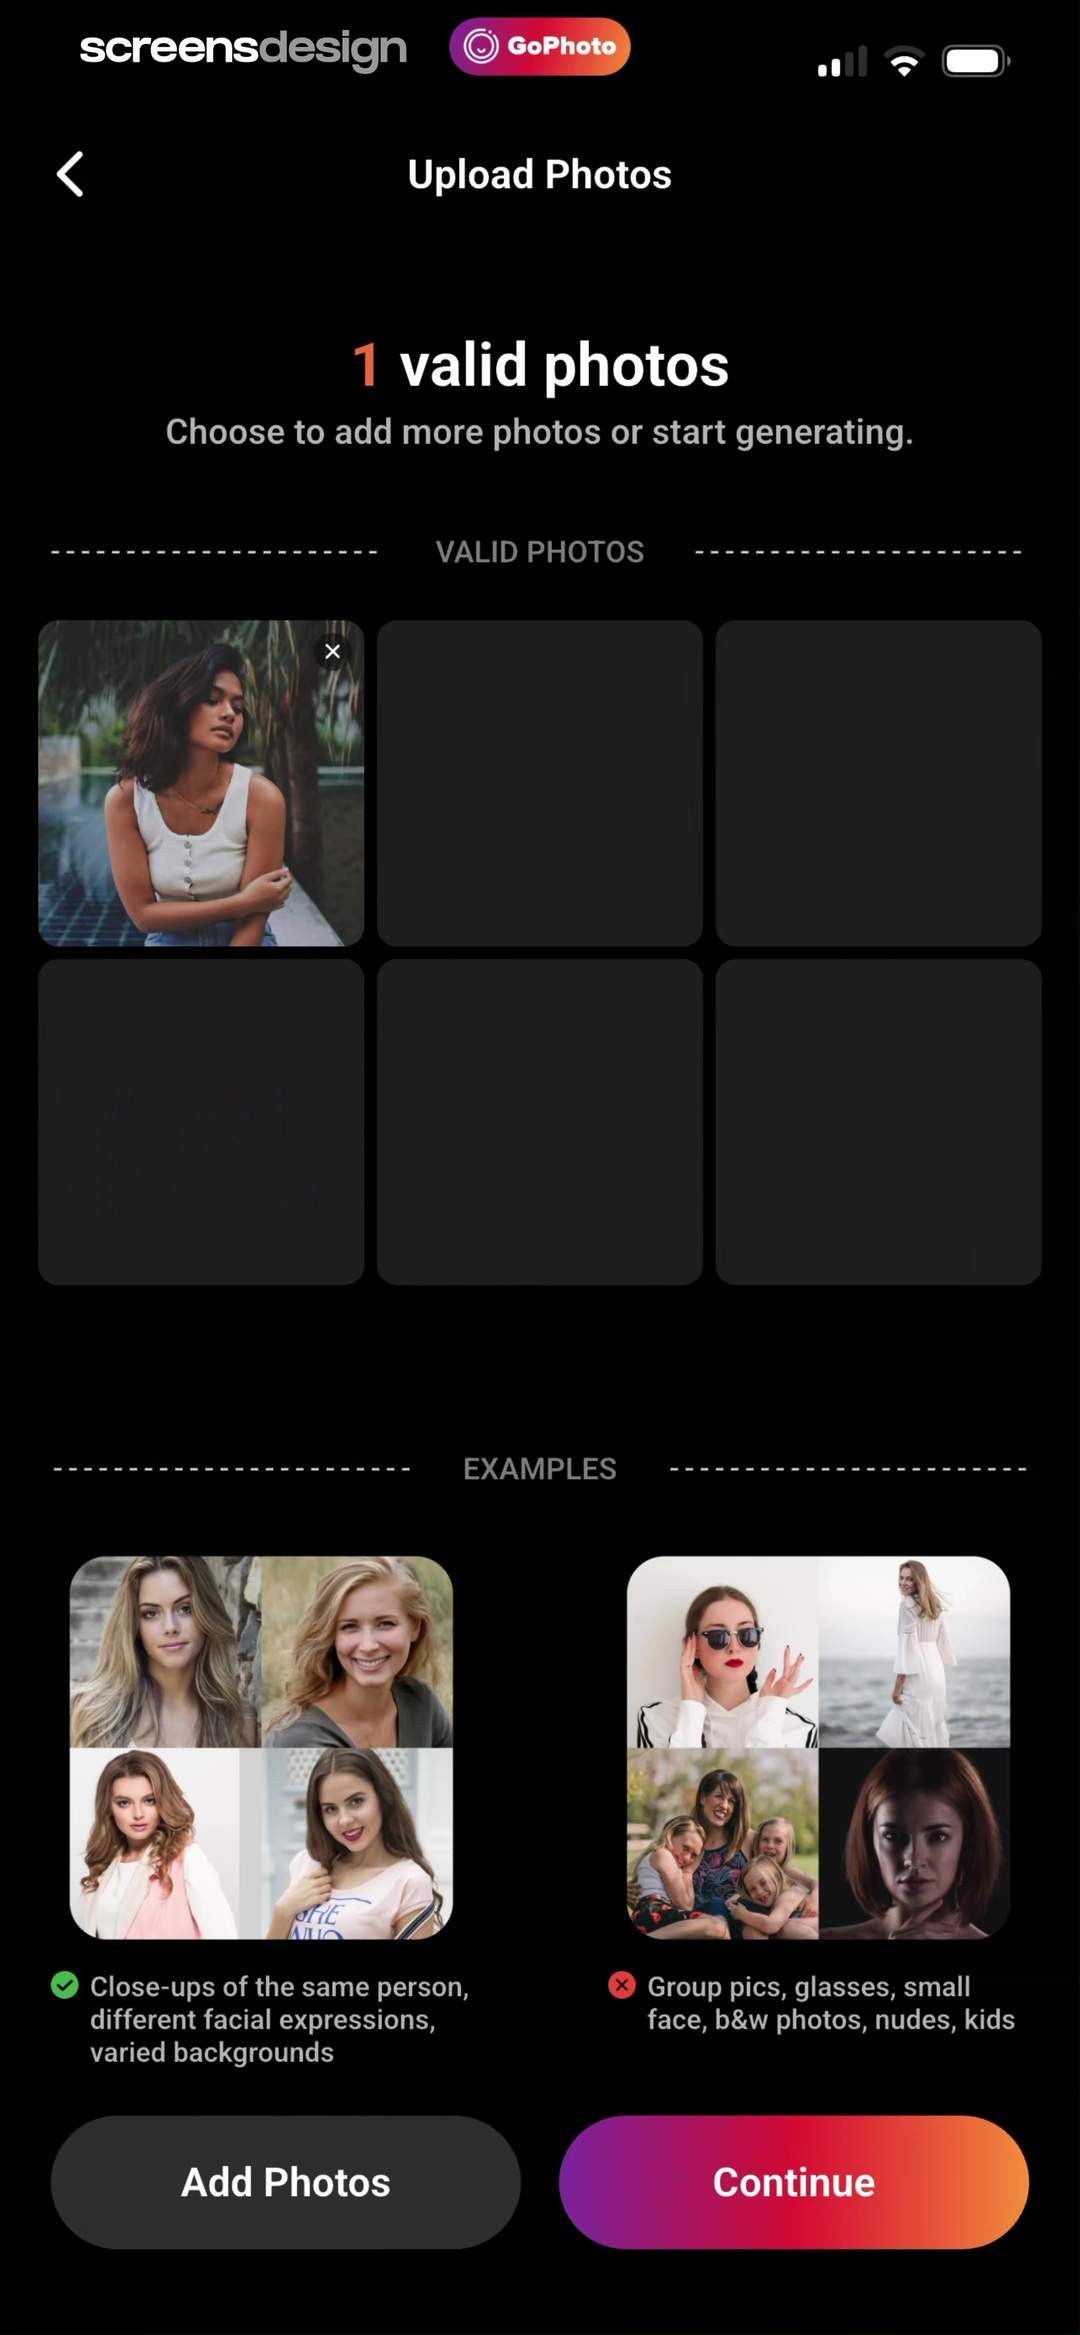
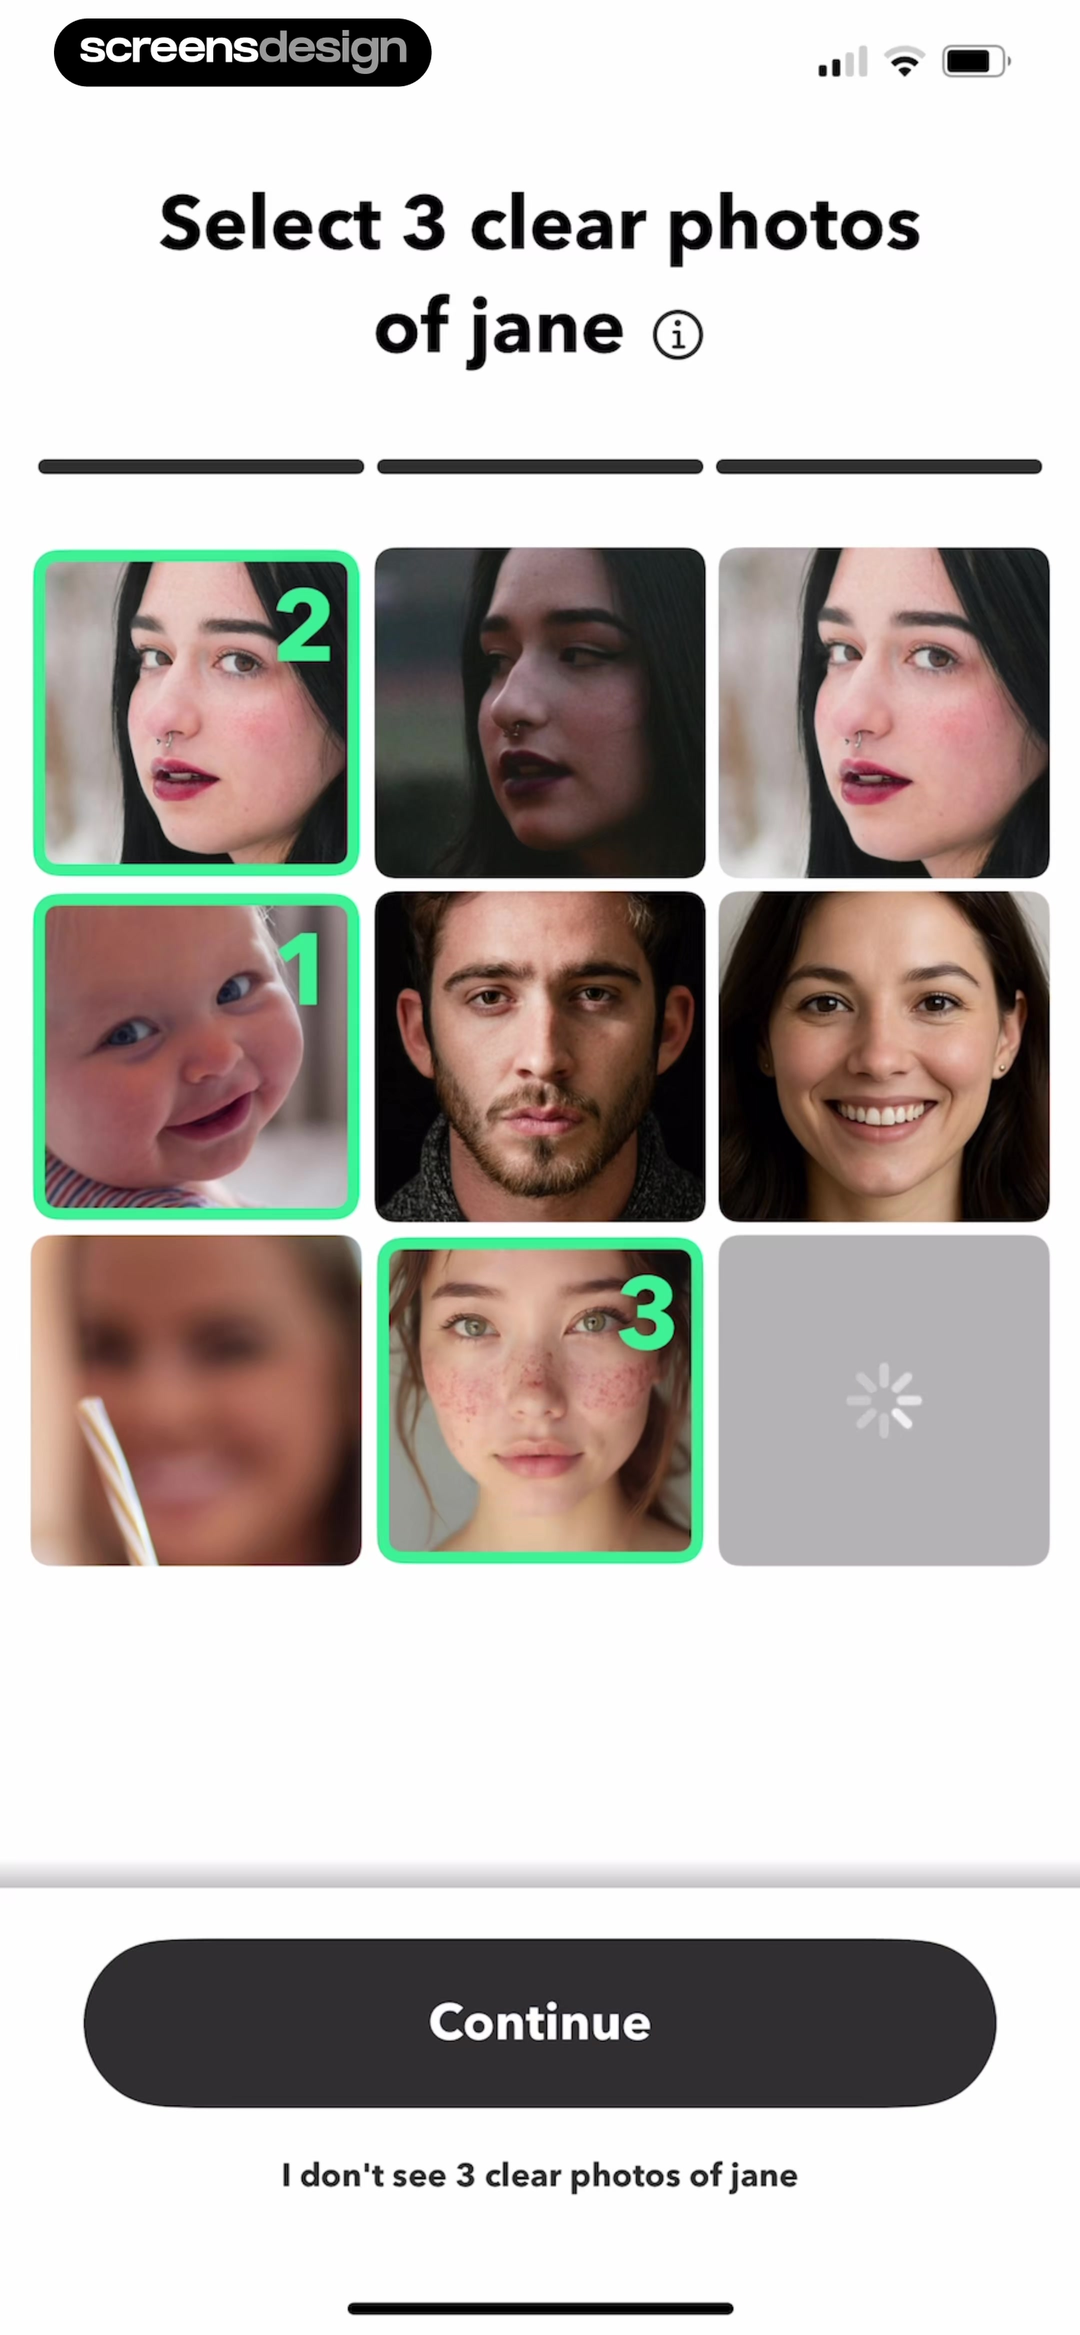
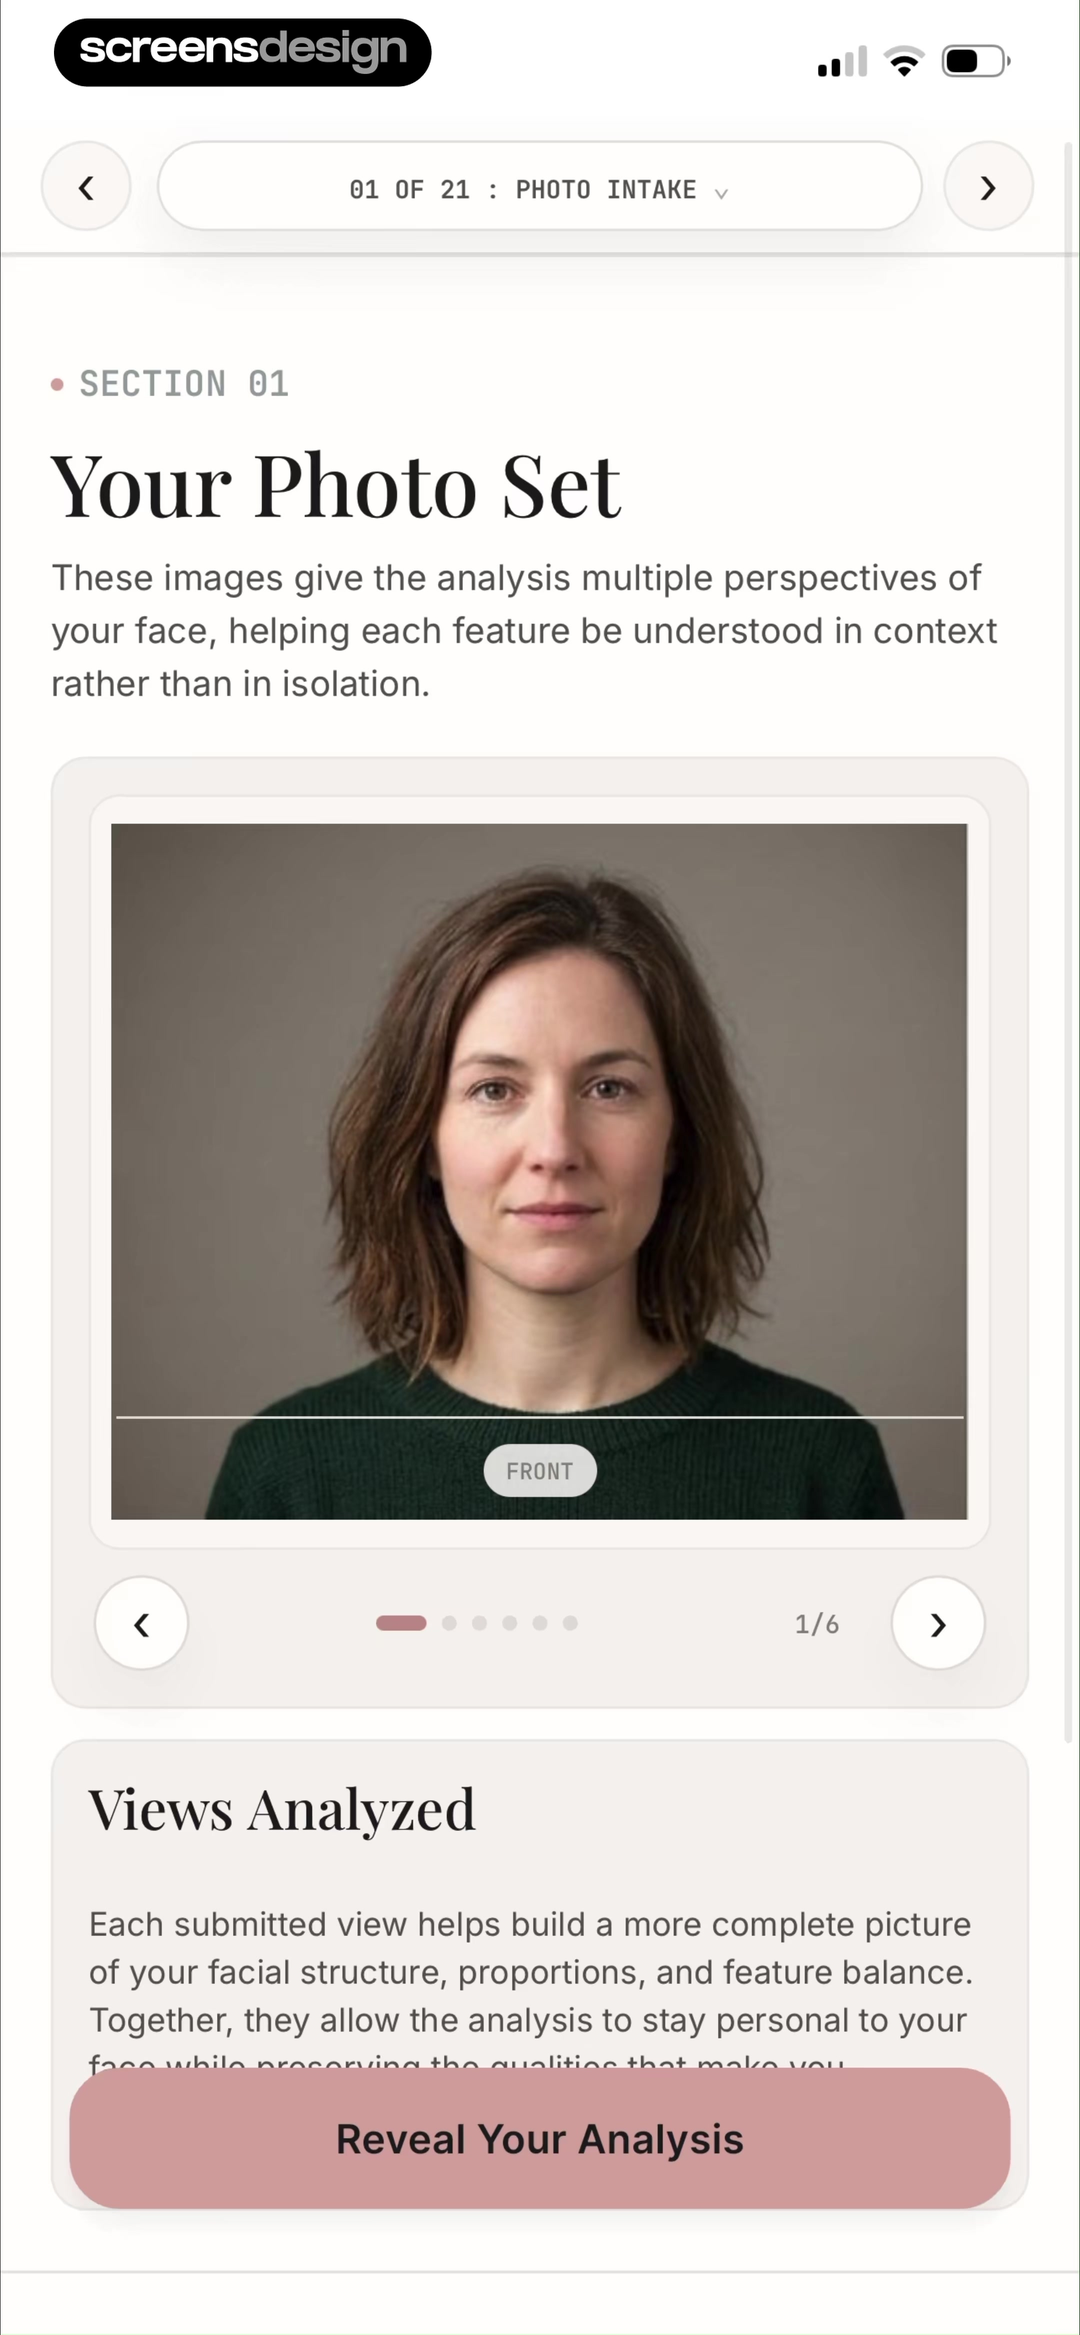
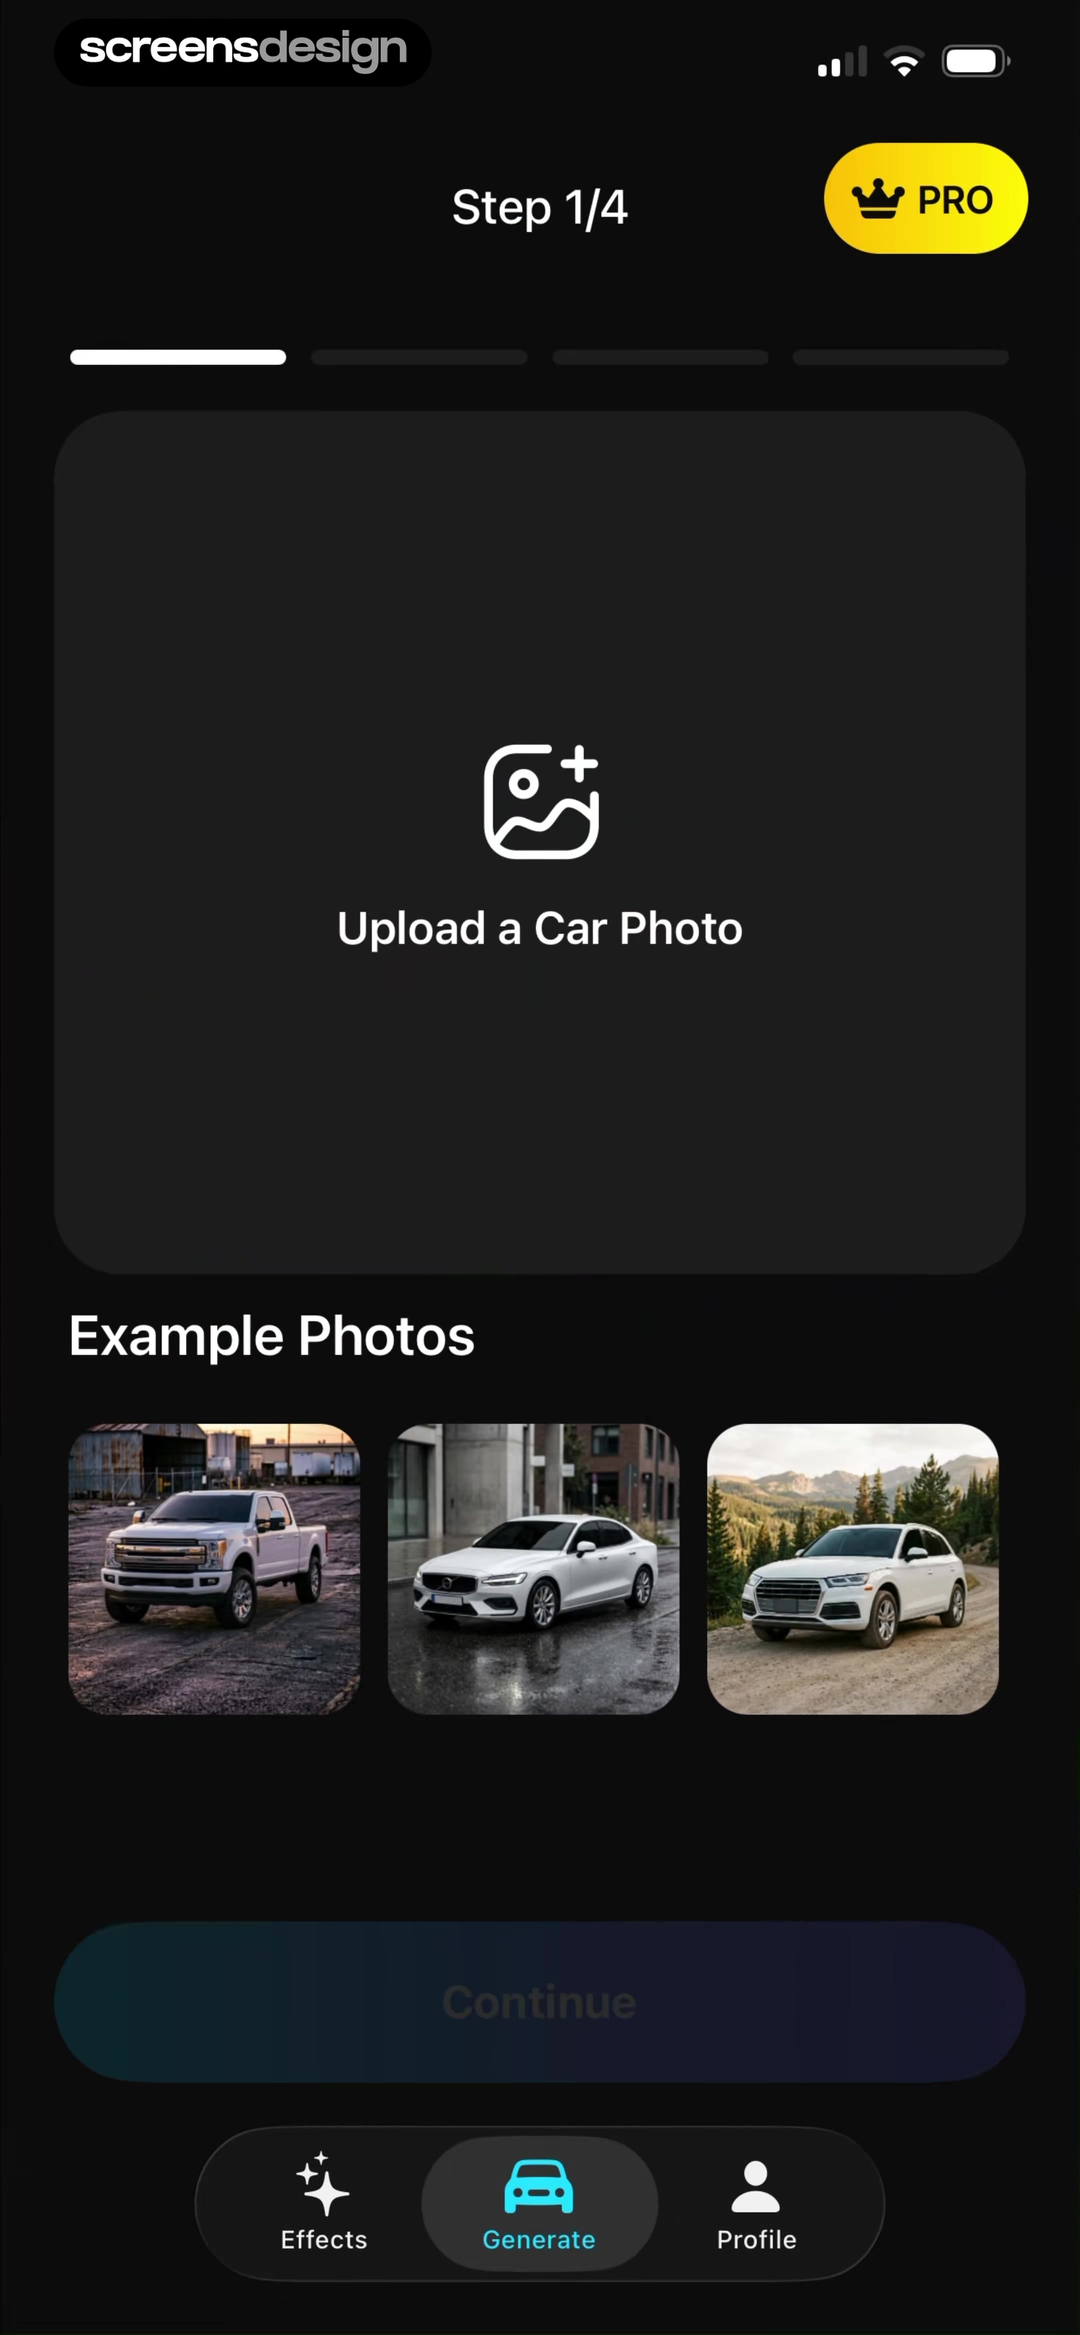
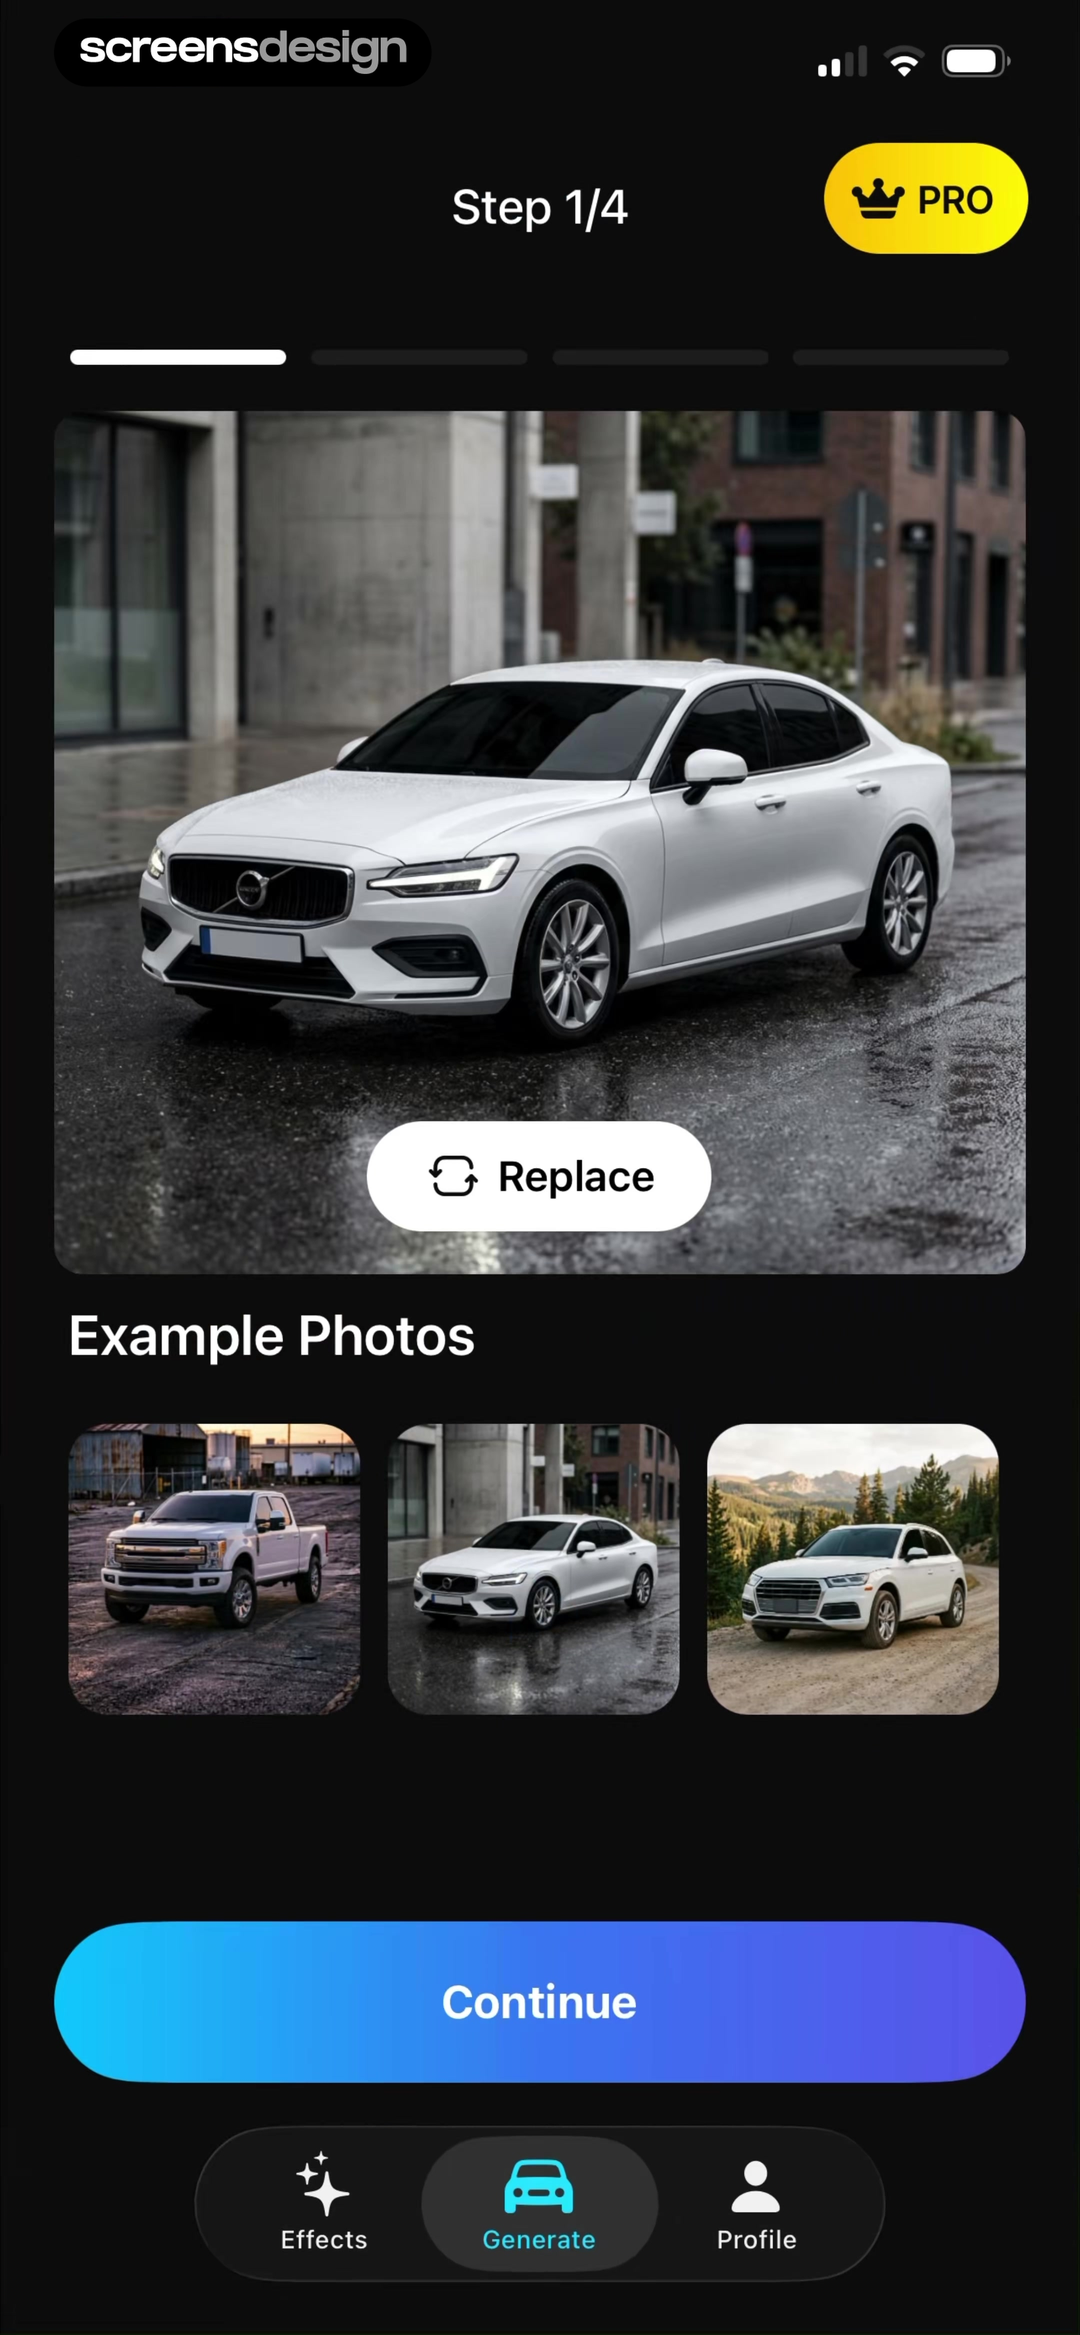
GoPhoto shows the current count, valid examples, invalid examples, and the choice to add more or continue. Precious asks for three clear photos of the same person and numbers the selected set. Refina explains why multiple facial views matter to its analysis. Modyfy uses one large car-photo slot and keeps replacement available after selection. The quantity differs because the product task differs.
A good intake screen answers four questions: what belongs in the frame, how many sources are required, what quality threshold applies, and whether the user can replace a mistake. Put these answers beside the picker. Hiding quality rules in a help page forces people to learn from a failed generation, which costs time and may consume credits.
Keep library and camera permissions contextual. Ask after the user chooses an input method, then explain the immediate benefit in plain language. If limited photo access works, support it. If the model needs several views, show completion progress and let users inspect each selected image. Never imply that a larger photo set is required when it is merely recommended.
03. Input quality
Prevent predictable failures before generation.
Quality guidance works best when it is visual, specific, and recoverable.
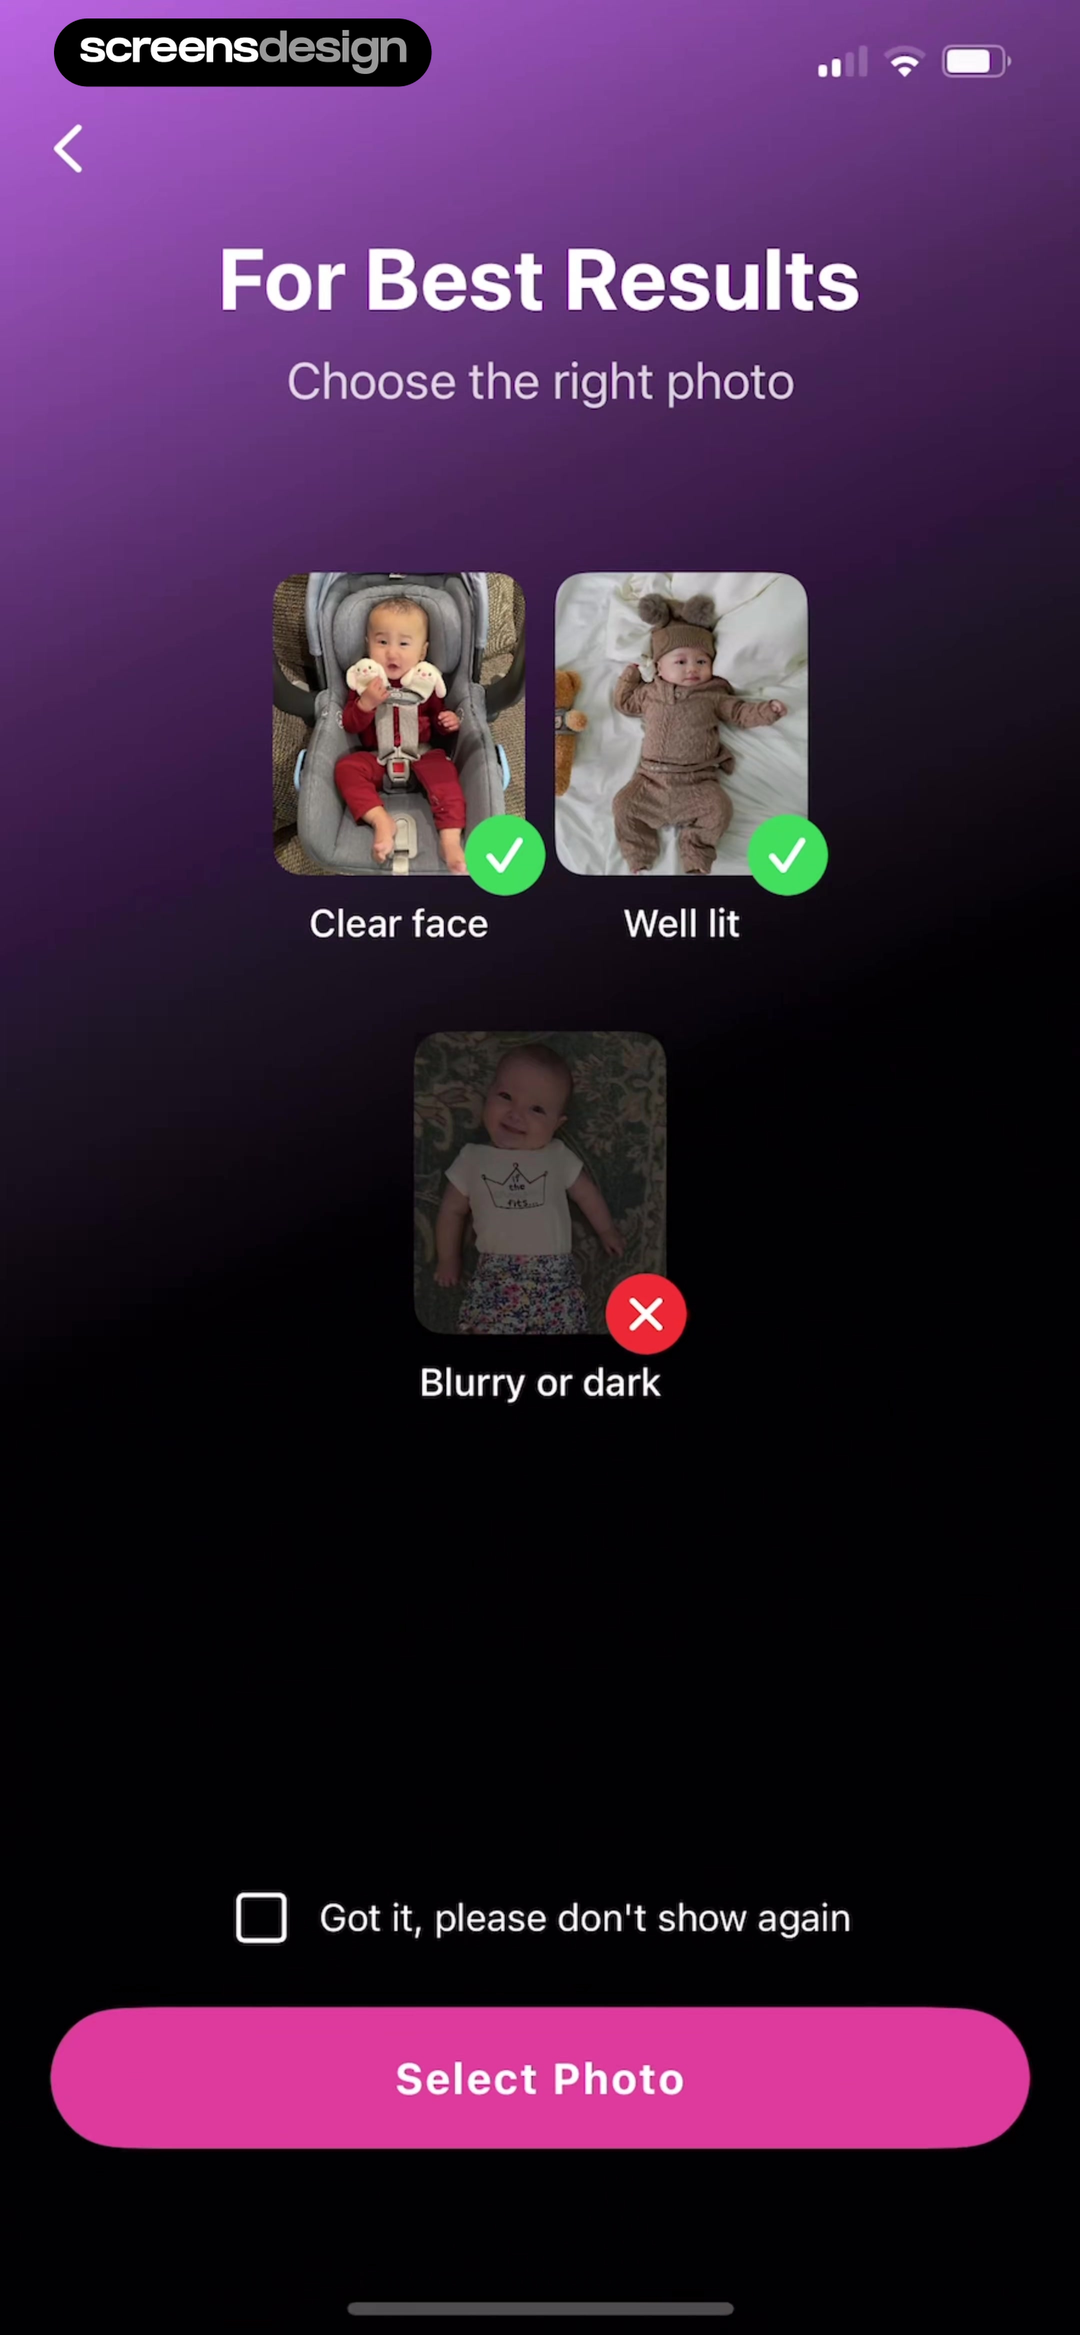
Precious contrasts clear, well-lit sources with blurry or dark ones. Modyfy keeps example photos visible both before and after a source is selected. These patterns help a user judge their own input rather than memorizing abstract rules. The examples should reflect the actual model constraints, including crop, subject size, lighting, occlusion, number of people, and acceptable file formats.
Do not overload the first picker with every edge case. Show the two or three failures responsible for most unusable results, then validate the chosen image and explain a specific correction. Replace vague messages such as bad photo with guidance such as face too small, multiple people detected, or image resolution too low. Preserve the rejected source while the user decides what to do next.
When the app works with sensitive portraits, quality guidance is also a trust moment. Keep body, age, and appearance language neutral. Explain how uploads are processed and deleted where relevant. If the result is a visualization rather than a prediction, say so near the output as well as during intake.
04. Generation and result
Keep the requested change visible through the wait.
Generation is a product state, not a decorative spinner between input and output.
Menace names the transformation step before moving forward. Lynsify presents background replacement as a specific edit rather than a vague AI feature. A useful generation state should retain the source thumbnail, instruction or chosen style, expected time range, credit consequence, and an honest cancellation rule. If processing continues in the background, say where the finished result will appear and whether a notification is optional.
The result screen should make comparison easy without implying the generated image is objectively better. Before-and-after controls, version history, and visible source labels help people evaluate the change. Separate save from share, and do not make public posting the default consequence of exporting. If another generation costs credits, show the cost before the tap.
Treat failures as part of the same loop. Preserve the prompt and source, identify whether the problem came from policy, format, connectivity, or generation quality, and offer the most relevant recovery. A generic try again button is weak when the next attempt will repeat the same unsupported input.
05. First workspace
End onboarding where the next edit can begin.
A finished tour is not activation if the workspace still has no obvious starting point.
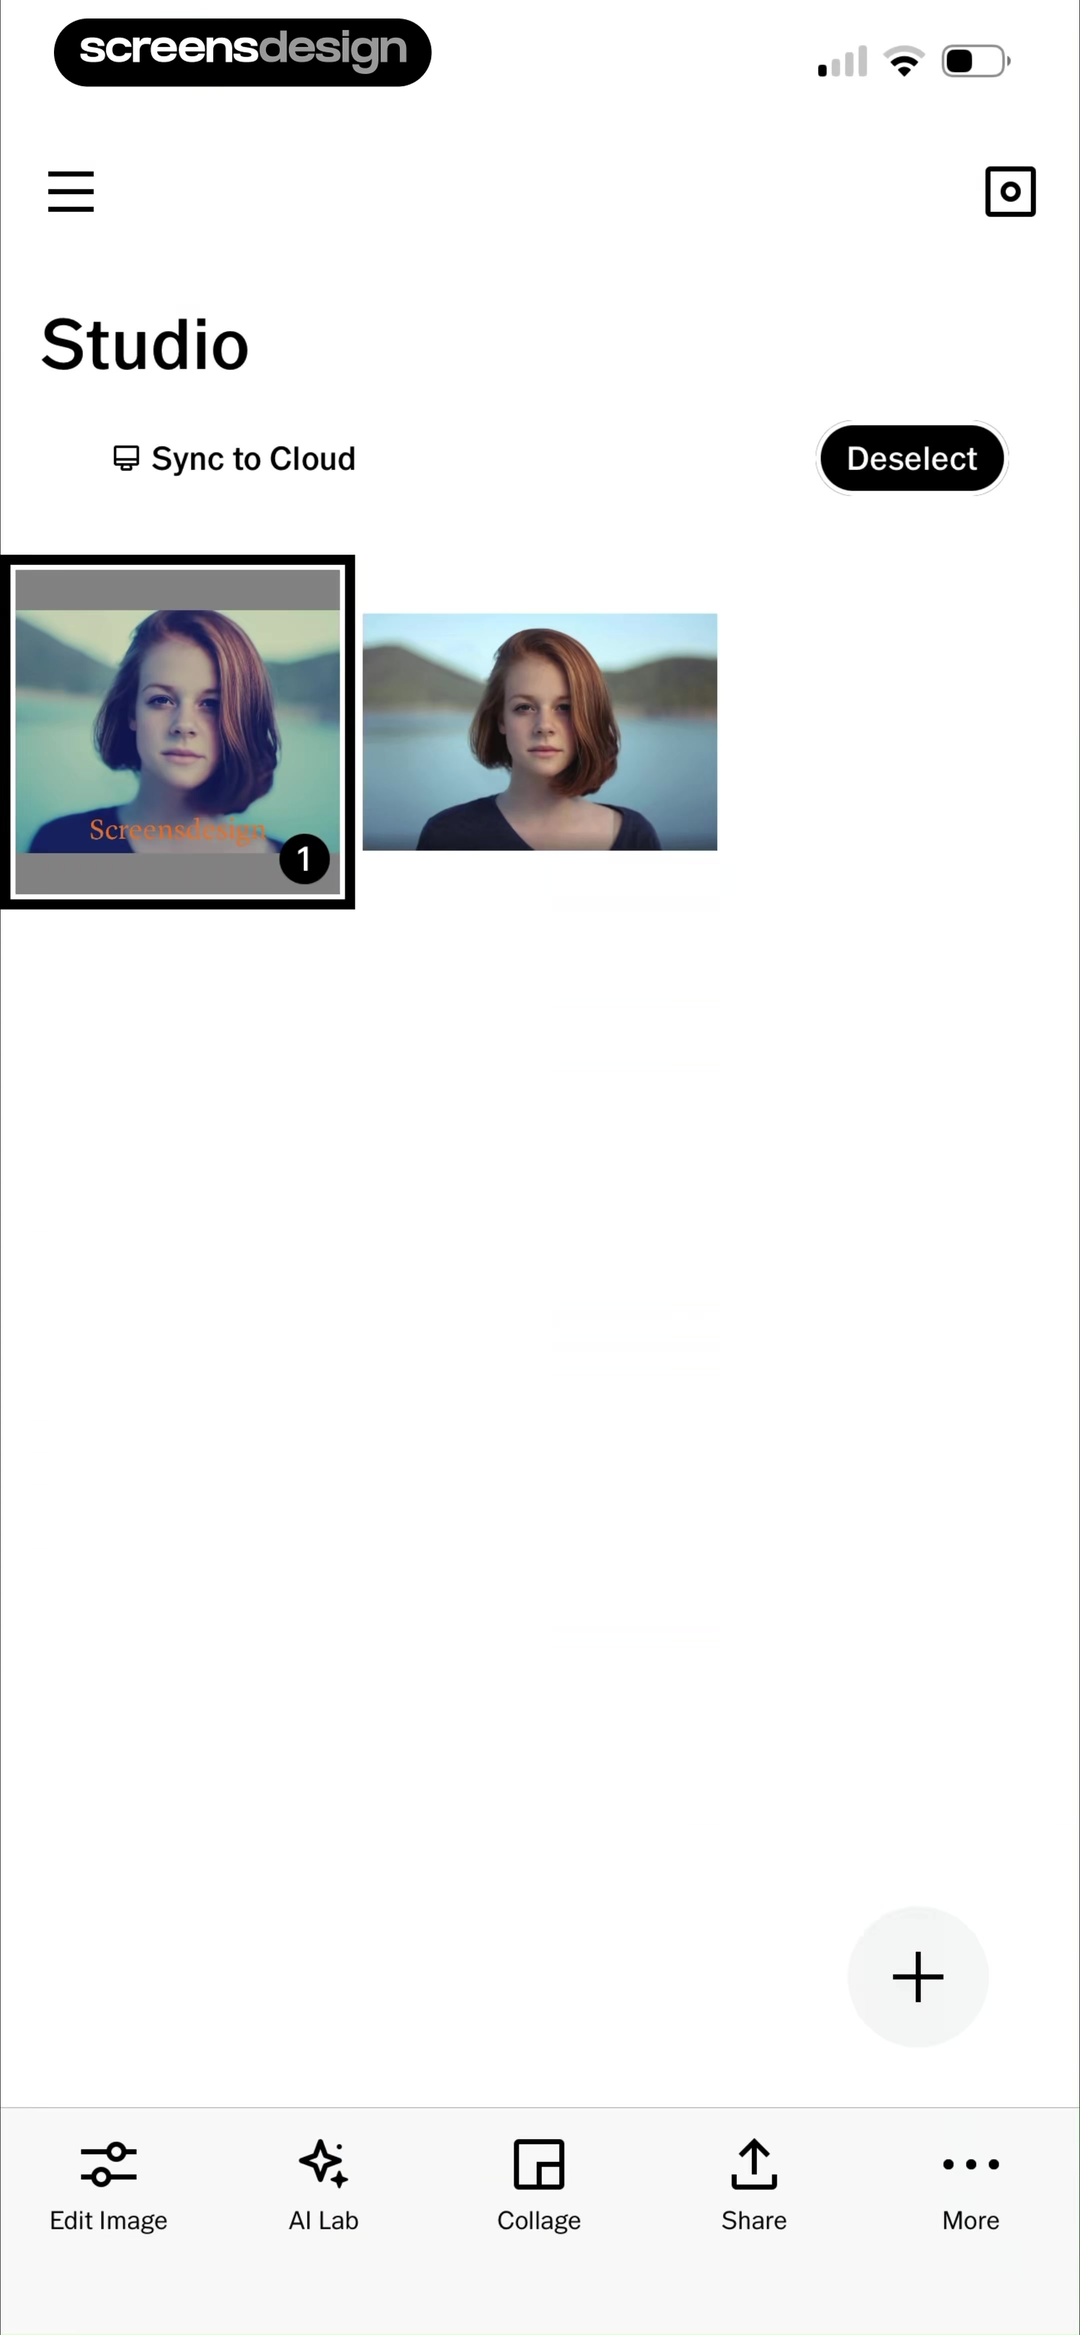
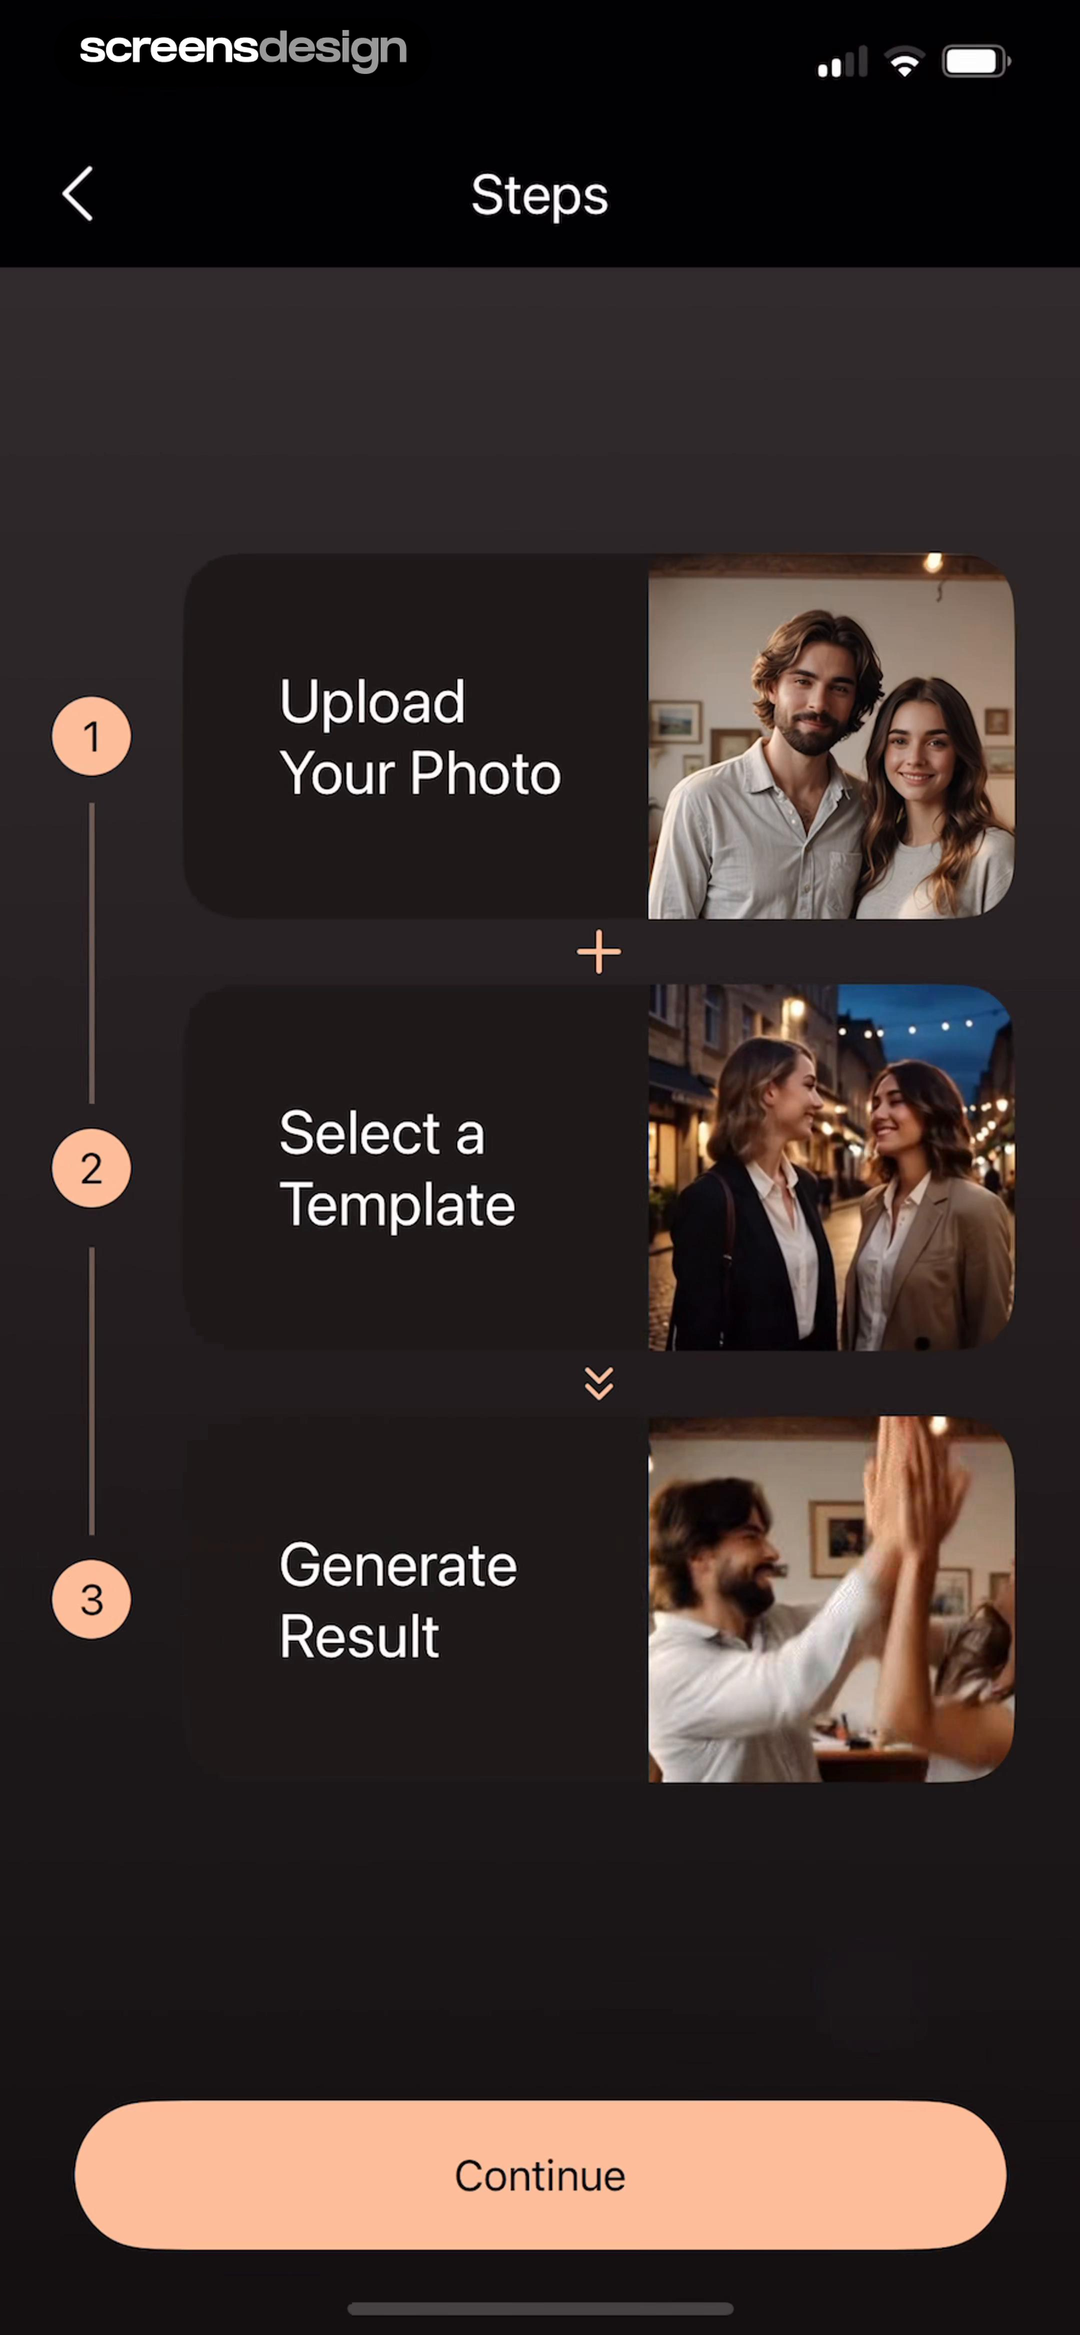
VSCO's Studio makes imported work the dominant object and exposes Edit Image, AI Lab, Collage, Share, and More after selection. Menace introduces a plain-language instruction field for adding, removing, or transforming something. PhotoDirector previews the full three-step loop from upload to template to generated result. Together they show how a workspace can expose the next action without hiding the eventual process.
The transition from onboarding should preserve choices that matter, such as style, intended output, or selected source. It should not preserve tutorial chrome that competes with the real interface. Use a sample project only when it can be clearly distinguished from the user's work and deleted safely.
A Pro reminder belongs at the point where a paid capability becomes relevant. Show what changes, such as more generations, a premium model, larger export, or version history, and keep the current work safe if the user declines. ScreensDesign Pro can help teams compare how other editors place upgrade moments around real creation tasks rather than treating the welcome screen as the only monetization opportunity.
Review checklist
Audit the complete first edit, not isolated onboarding pages.
Record a fresh install and complete the loop with a strong source, weak source, denied permission, interrupted generation, declined upgrade, and failed export. The handoffs reveal more than a static welcome screen. Review every claim against what the product can consistently deliver and test copy at the real device width.
Watch where the user must remember information from a previous page. Input requirements, selected style, credit cost, and output destination should reappear when they influence a decision. Finally, compare the free and paid paths so a declined offer returns to a useful state instead of a dead end.
- The first screen names one transformation and one next action.
- The photo picker states quantity, quality, crop, and replacement rules.
- Permissions appear only after the user chooses camera or library access.
- Generation keeps the source, instruction, time, and credit consequence visible.
- Failure messages preserve work and recommend a specific correction.
- Results support comparison, refinement, save, and another attempt.
- Upgrade prompts explain the paid capability without discarding the current edit.
- Privacy and synthetic-output language appears where the relevant decision happens.
Questions and answers
AI photo editor onboarding questions
What should AI photo editor onboarding include?
Explain the source, transformation, input requirements, expected wait, result controls, and data handling needed for one complete edit. Introduce additional models and styles after the first successful loop.
When should an AI photo app ask for photo access?
Ask after the user chooses to upload or capture a photo. Explain the immediate task, support limited access where possible, and keep an alternative path visible if permission is declined.
How can an app reduce failed AI photo generations?
Show visual source guidelines before upload, validate the selected image, explain the exact problem, and preserve the source and instruction during recovery.
Should onboarding show AI photo results before upload?
A representative result can set the mental model, but it should be labeled as an example and should not imply that every source will produce the same quality or appearance.
Where should an AI photo editor show its paywall?
Place the offer where the paid capability is concrete, such as choosing a premium model, increasing generation capacity, removing an export limit, or saving version history. Preserve the user's work if they decline.
How do I research more AI photo editor screens?
Open the replay links in this article to inspect each surrounding flow, then search ScreensDesign by task such as photo upload guidance, generation progress, before and after comparison, AI Lab, or export limits.
Apps referenced in this page
Open the products behind the examples.






2,715 apps in the top charts.Ask them anything.
Search recorded AI photo editor screens, inspect the complete first-edit sequence, and ask ScreensDesign Pro how leading apps handle the exact upload, generation, result, or upgrade moment you are designing.